Azure DevOps Pull Request build validation pipeline for .Net 5 project
When working in teams, we always want to ensure that any new PR (Pull Request) doesn't break the main build pipeline, deploy broken code or cause unit test cases to fail. We never want the PR to be merged to the master/main branch and then revert it back once the build pipeline fails, instead we always prefer a proactive approach of preventing the PR from merging if the build is failing.
This article covers creating a YAML based PR build validation pipeline for the .Net 5 project and setting build policies in Azure DevOps to ensure all PRs to the master branch are automatically validated using the pipeline and only build validated PRs can be merged.
We will be using a sample Azure DevOps repo having the Getting started ASP.NET Core Web App project running on .Net 5 checked in. The same set of steps can be used for other .Net 5 projects as well.
This article will perform the following on the Azure DevOps project:
- Setup PR Build validation YAML pipeline
- Add the pipeline to Azure DevOps pipelines
- Add build validation policy for master/main branch
- Create PRs & test it
Setup PR Build validation pipeline
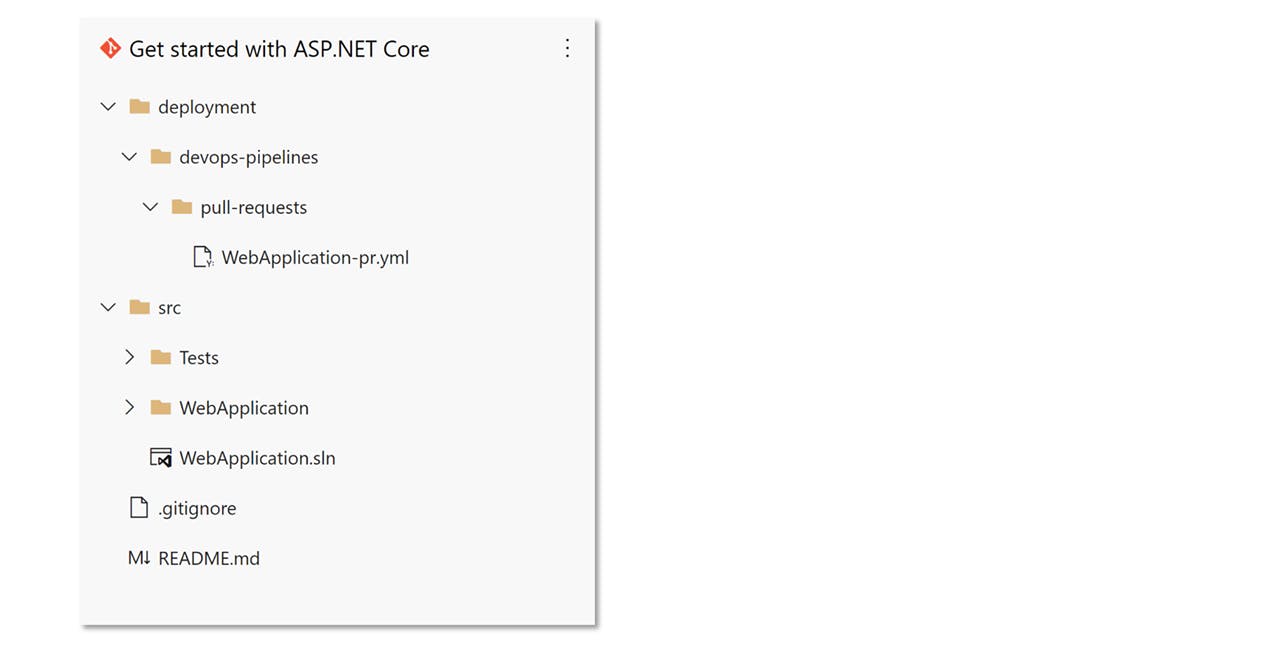
The first step is to set up a PR build validation yaml pipeline. I usually prefer to keep the pull request pipelines in the deployment\devops-pipelines\pull-requests folder from the root of the repository.
Create a WebApplication-pr.yml file (any file name that suits your project) in the deployment\devops-pipelines\pull-requests folder with the following content to create the PR pipeline which restores, builds, and tests the .Net 5 project code.
# File: WebApplication-pr.yml
# Description:
#   PR build pipeline for WebApplication solution.
#   This job performs the following activities:
#     - Restores
#     - Builds
#     - Tests projects & collects code coverage

trigger: none

variables:
  # Working Directory
  workingDirectory: '$(System.DefaultWorkingDirectory)/'
  buildPlatform: 'Any CPU'
  buildConfiguration: 'Release'

stages:
  - stage: Build
    displayName: Build stage

    jobs:
      - job: Build
        displayName: Build
        pool:
          name: 'Azure Pipelines'
          vmImage: 'windows-latest'

        steps:
          # Install .Net 5.0
          - task: UseDotNet@2
            displayName: 'Install .NET 5.0 SDK'
            inputs:
              packageType: 'sdk'
              version: '5.0.x'

          # Restore dependencies
          - task: DotNetCoreCLI@2
            displayName: 'Restore NuGet packages'
            inputs:
              command: 'restore'
              projects: '**\WebApplication.sln'
              feedsToUse: 'select'
              includeNuGetOrg: true
              noCache: false

          # Build the solution
          - task: DotNetCoreCLI@2
            displayName: 'Build solution file'
            inputs:
              command: 'build'
              projects: '**\WebApplication.sln'
              arguments: '--configuration $(BuildConfiguration)'

          # Run the tests and collect code coverage
          - task: DotNetCoreCLI@2
            displayName: 'Test .Net Core Project in code'
            inputs:
              command: 'test'
              projects: |
                src\Tests\**\*.csproj
              publishTestResults: true
              arguments: '--configuration $(BuildConfiguration) --collect:"Code coverage"'
The pipeline does 4 tasks in the Build stage - i.e.,
- Install .Net 5.0 in the agent
- Restore dependencies
- Build the solution
- Run the tests and collect code coverage
This is the bare minimum PR pipeline, but you could add in other tasks as required.
The above DevOps pipeline doesn't have any trigger defined as we will use the Azure DevOps Build Validation policies for triggering it. Also, the agent being used is a Microsoft Hosted Agent, in case your choice of agent is different, please change the pool in the build job.
Check-in the above pipeline to your code repository, and let's trigger it from Azure DevOps so that we can test the pipeline.
Add the pipeline to Azure DevOps pipelines
To add the above checked-in yaml pipeline to Azure DevOps pipelines,
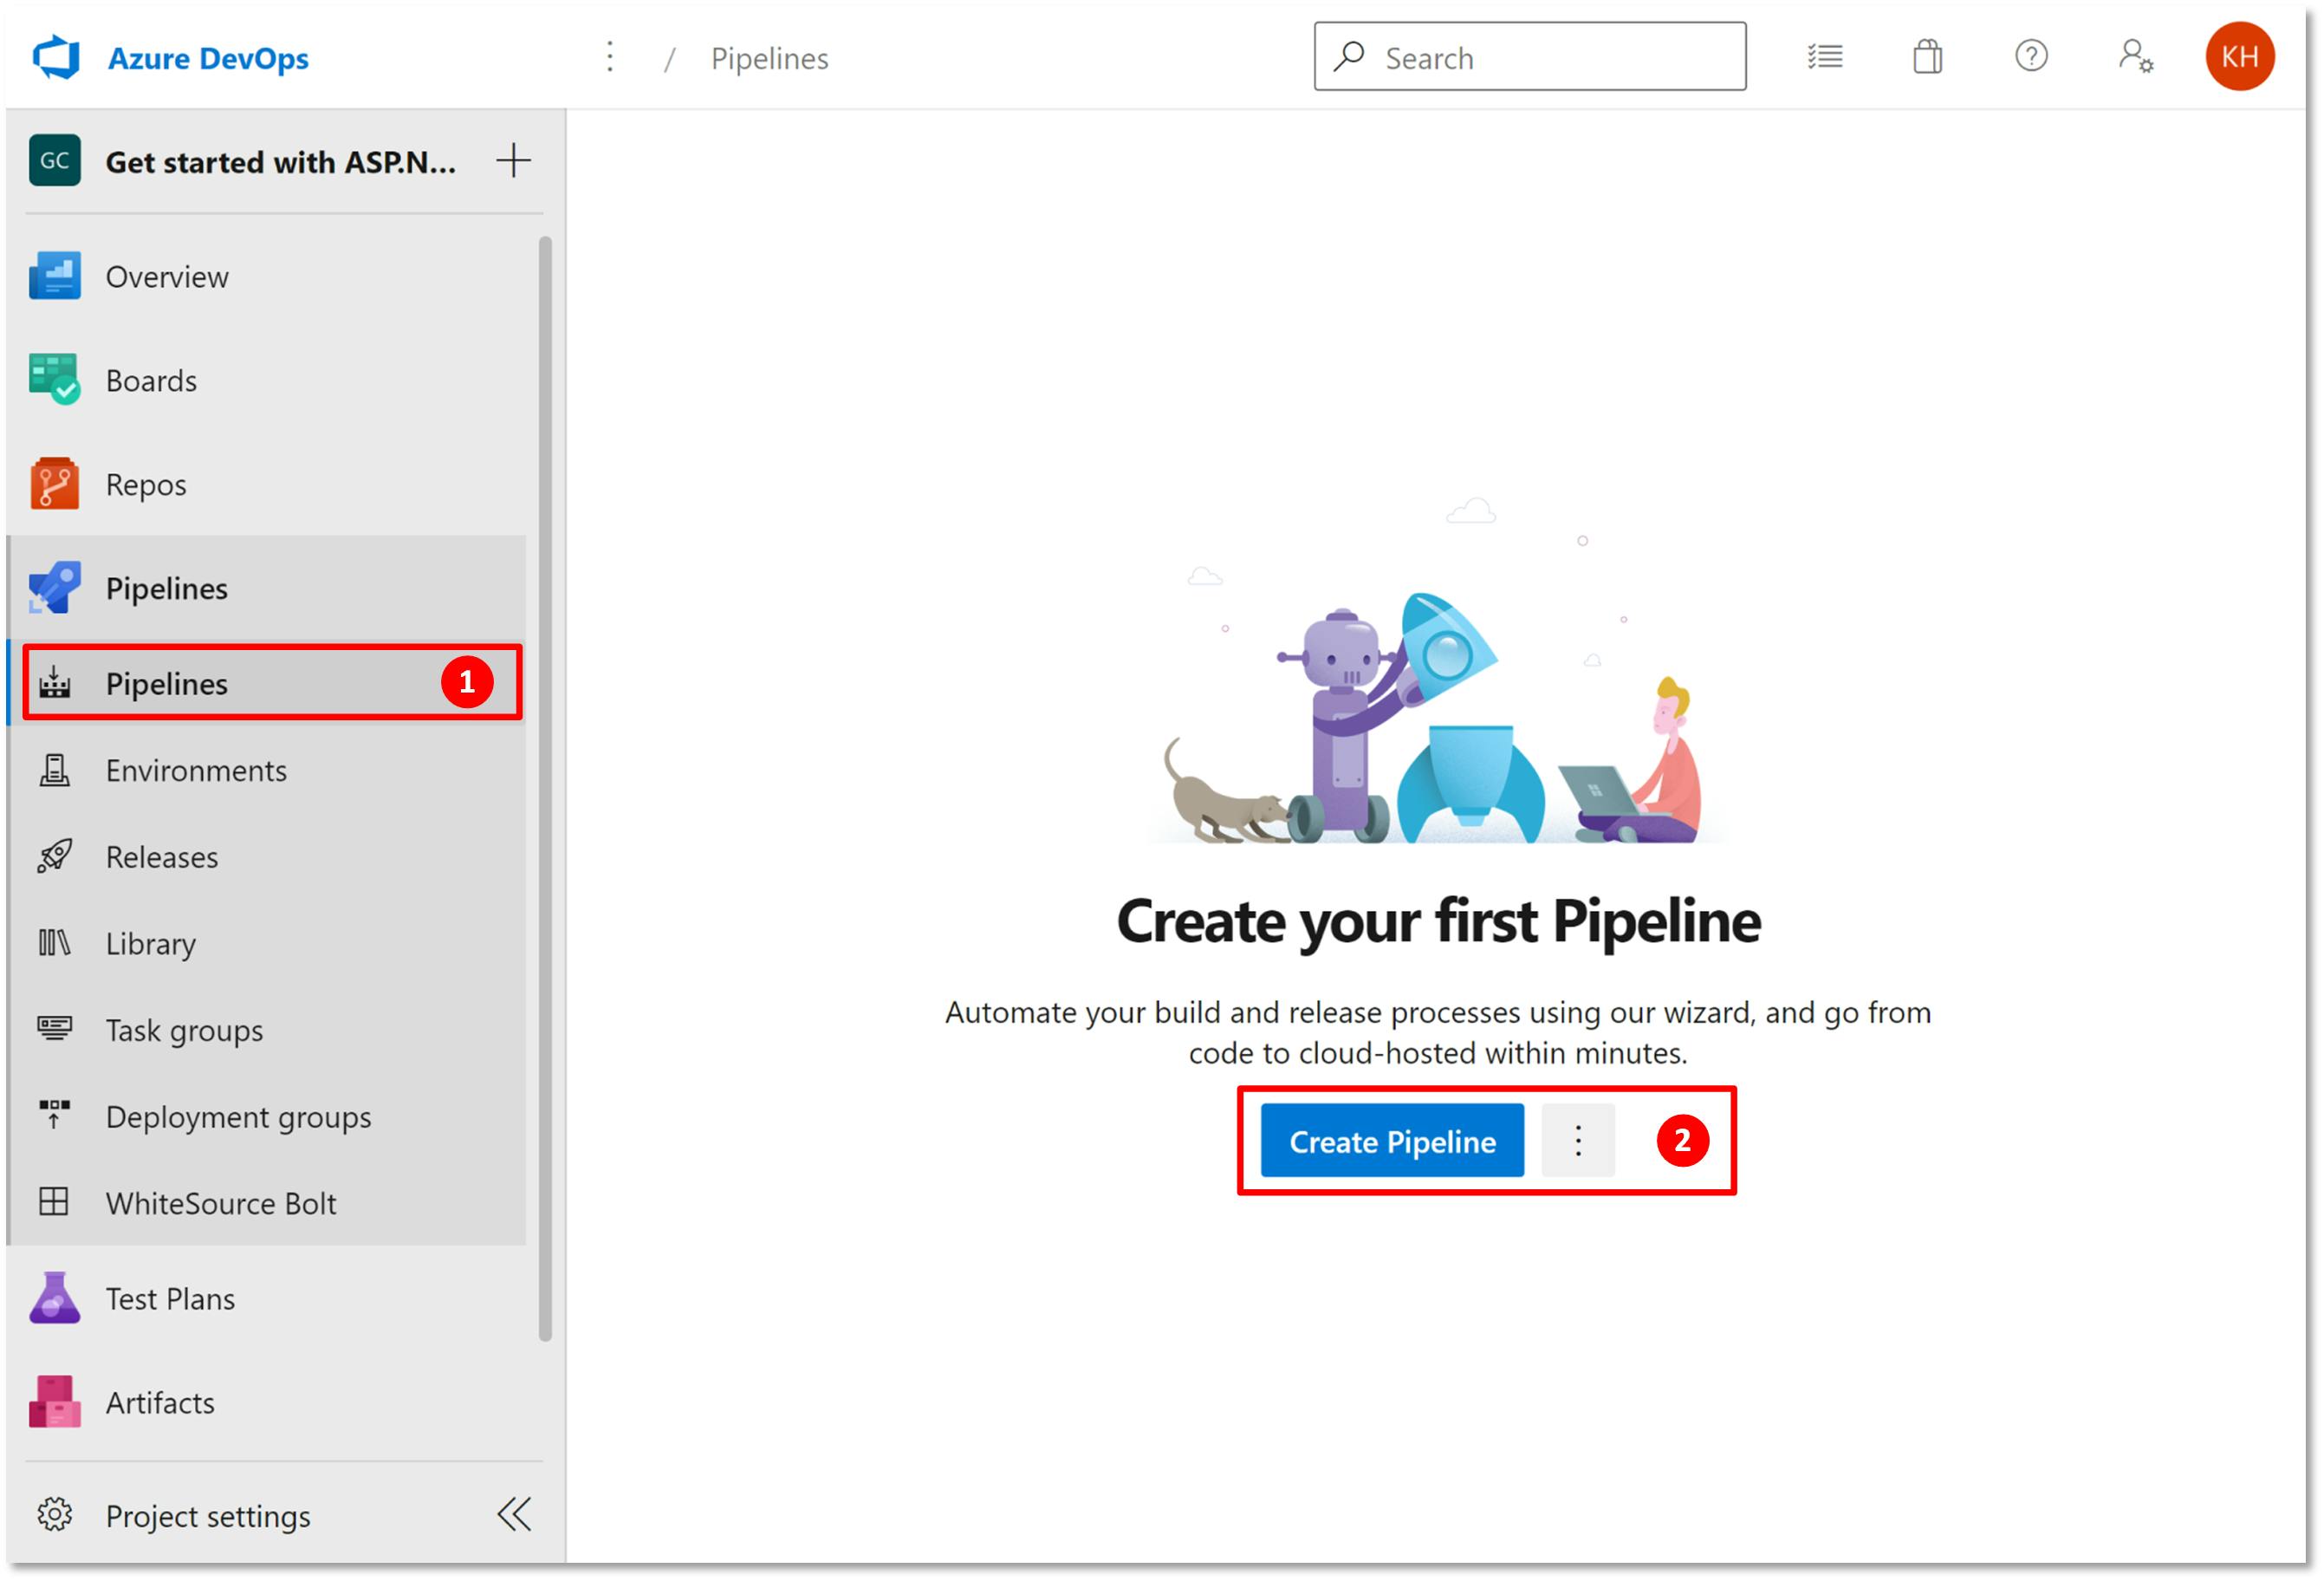
- Navigate to 'Pipelines' in Azure DevOps. Select 'Create Pipeline' or 'New Pipeline' to create a new pipeline.
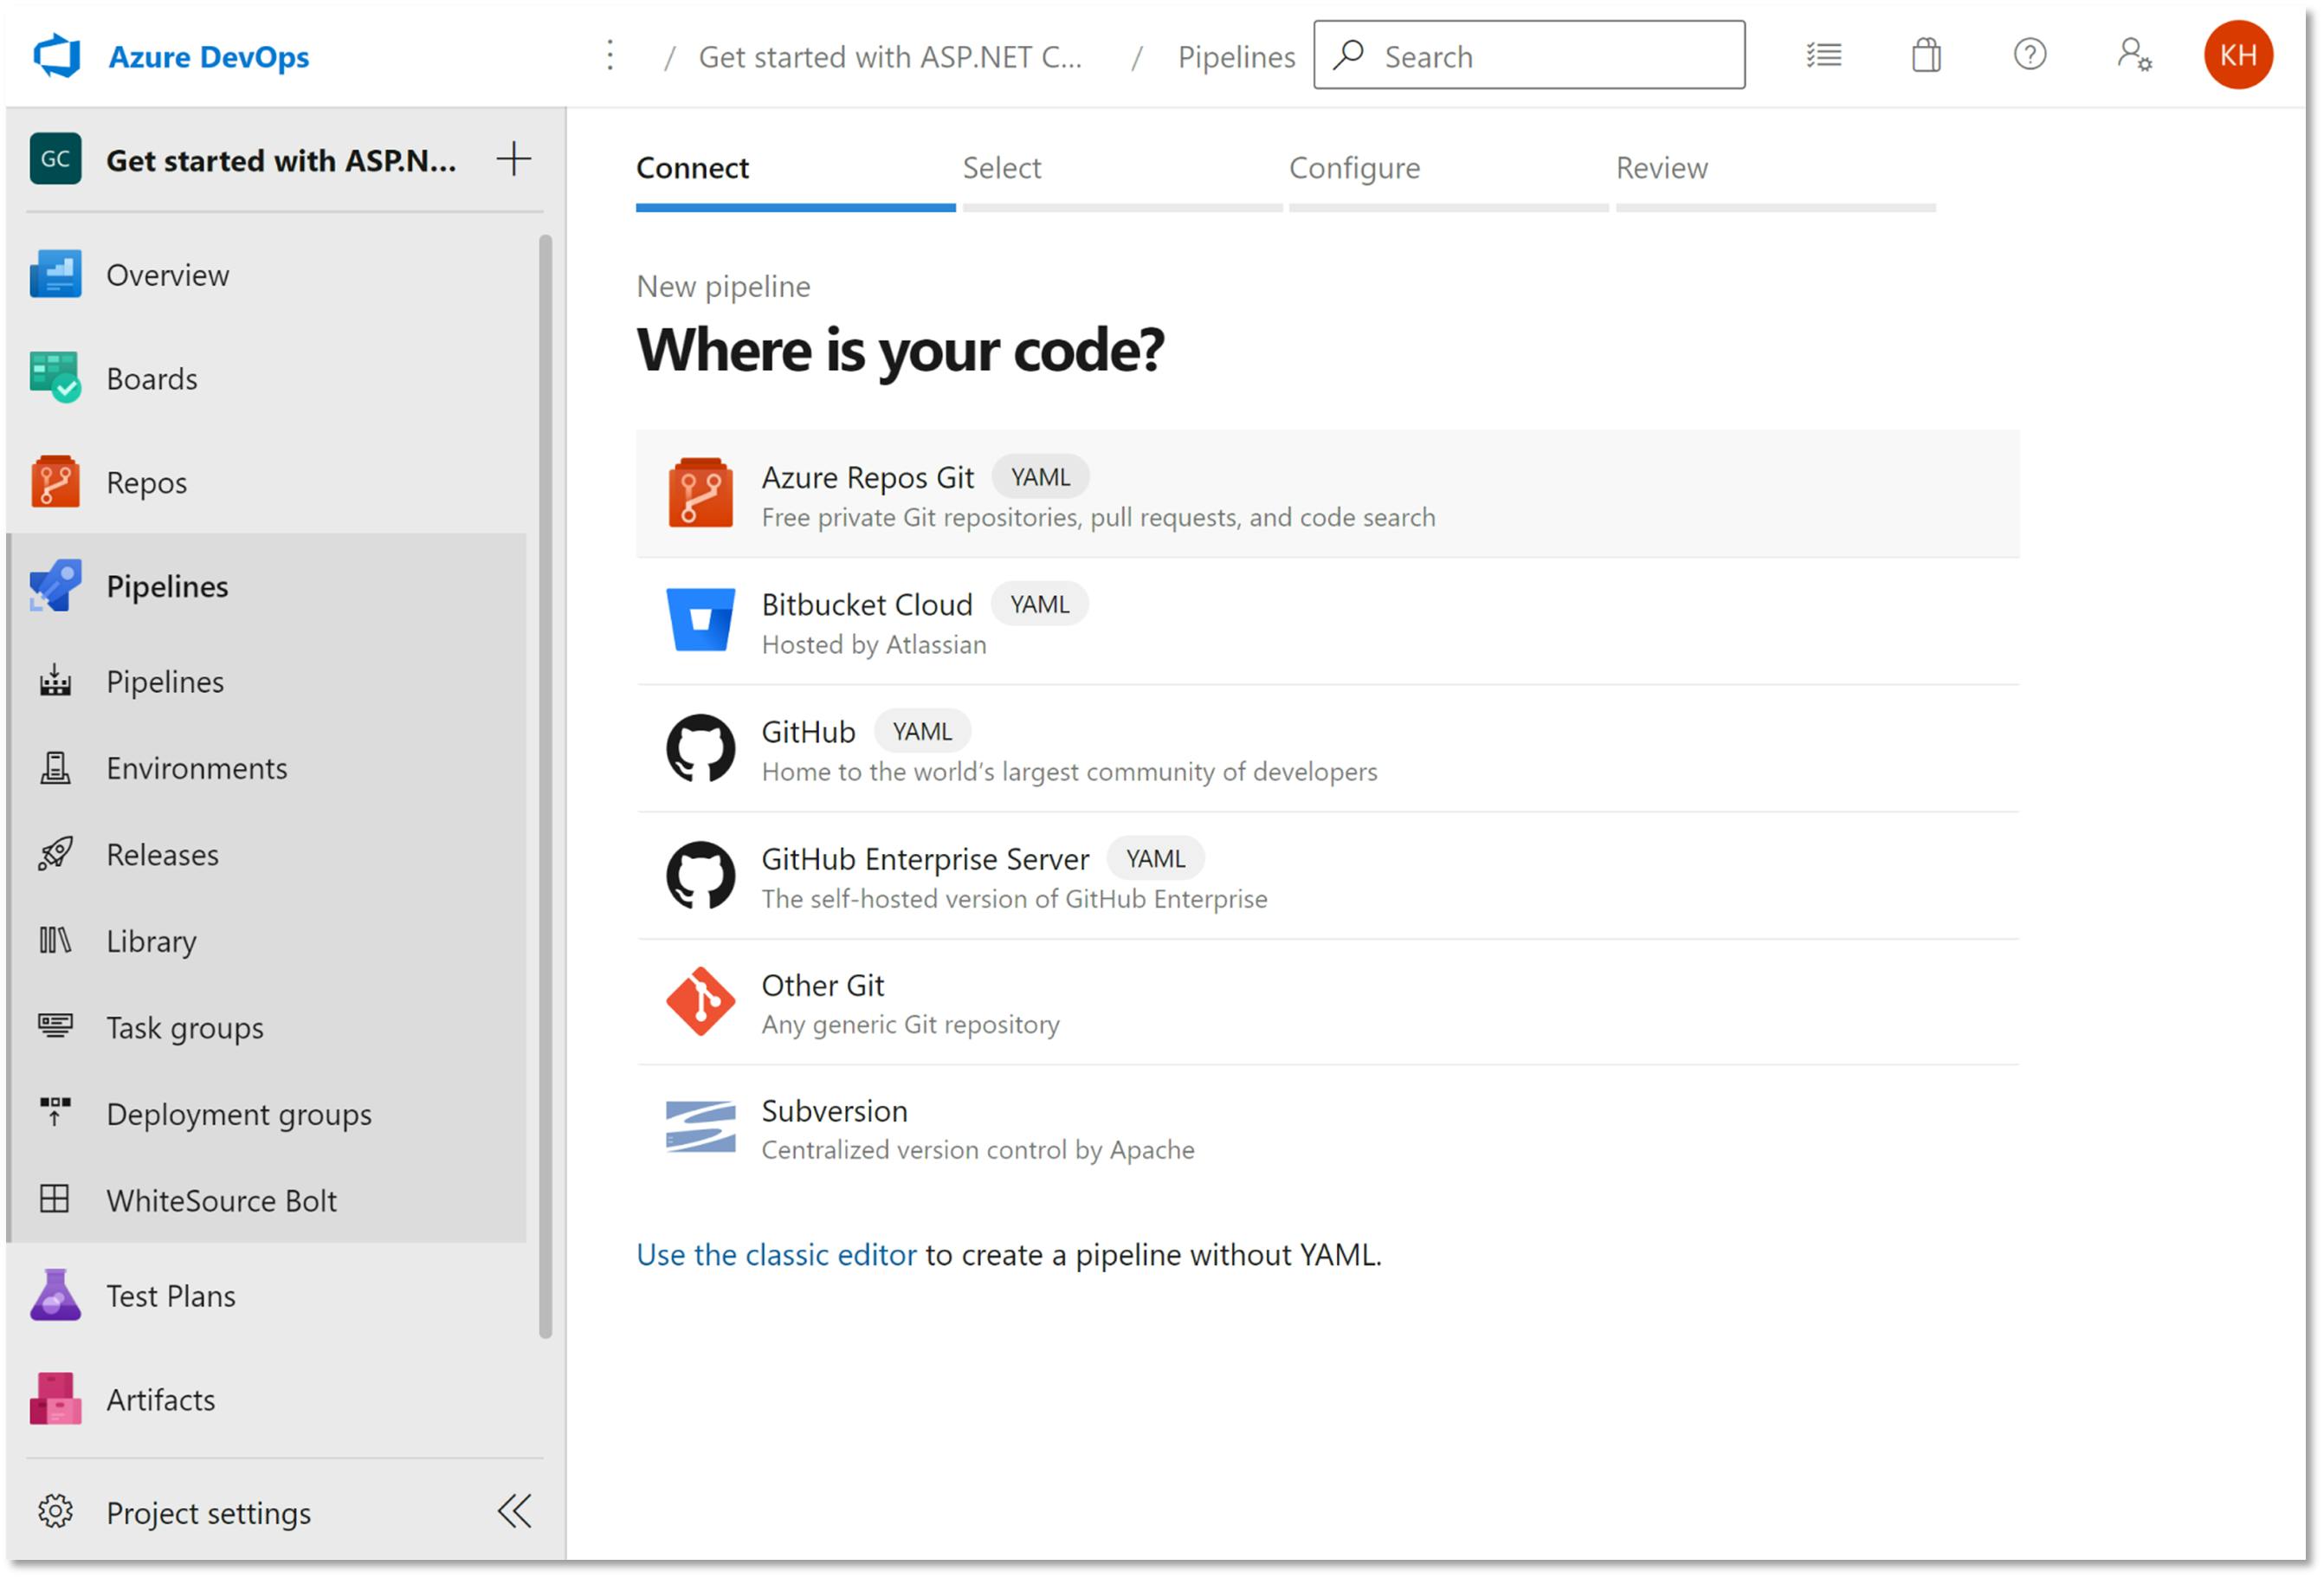
- Select the code repo.
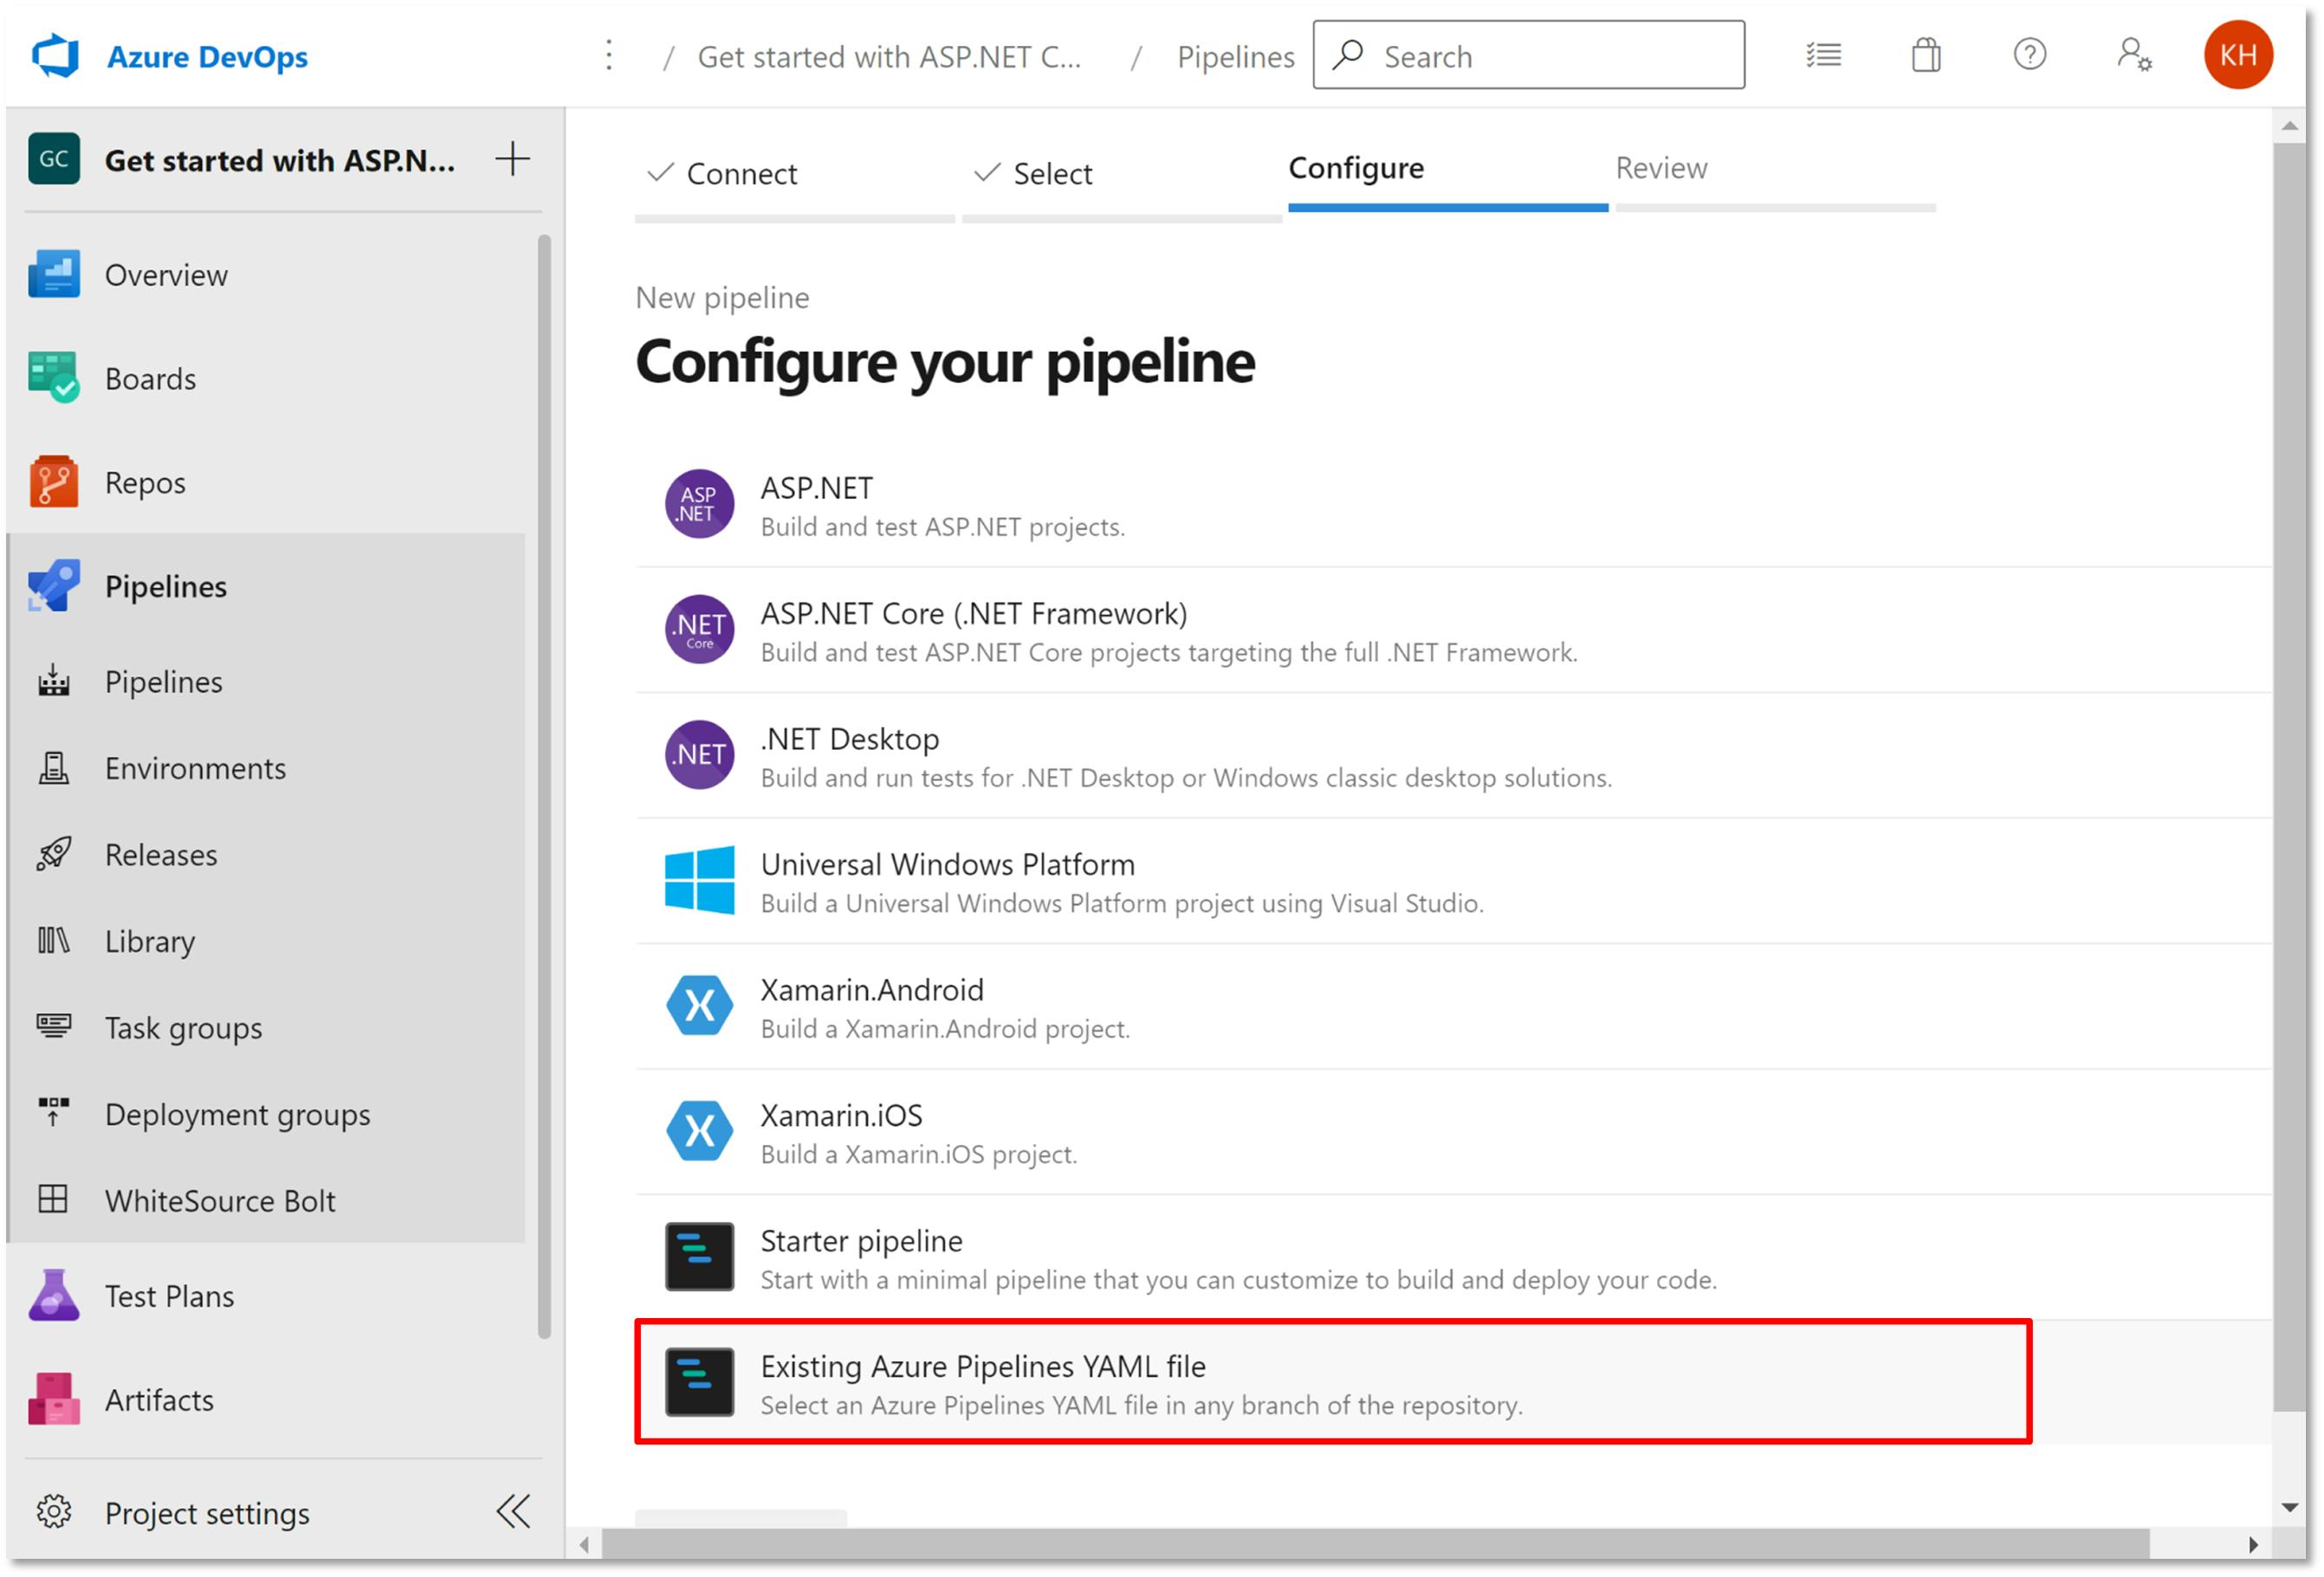
- Click on 'Existing Azure Pipelines YAML file' from the pipeline configuration page.
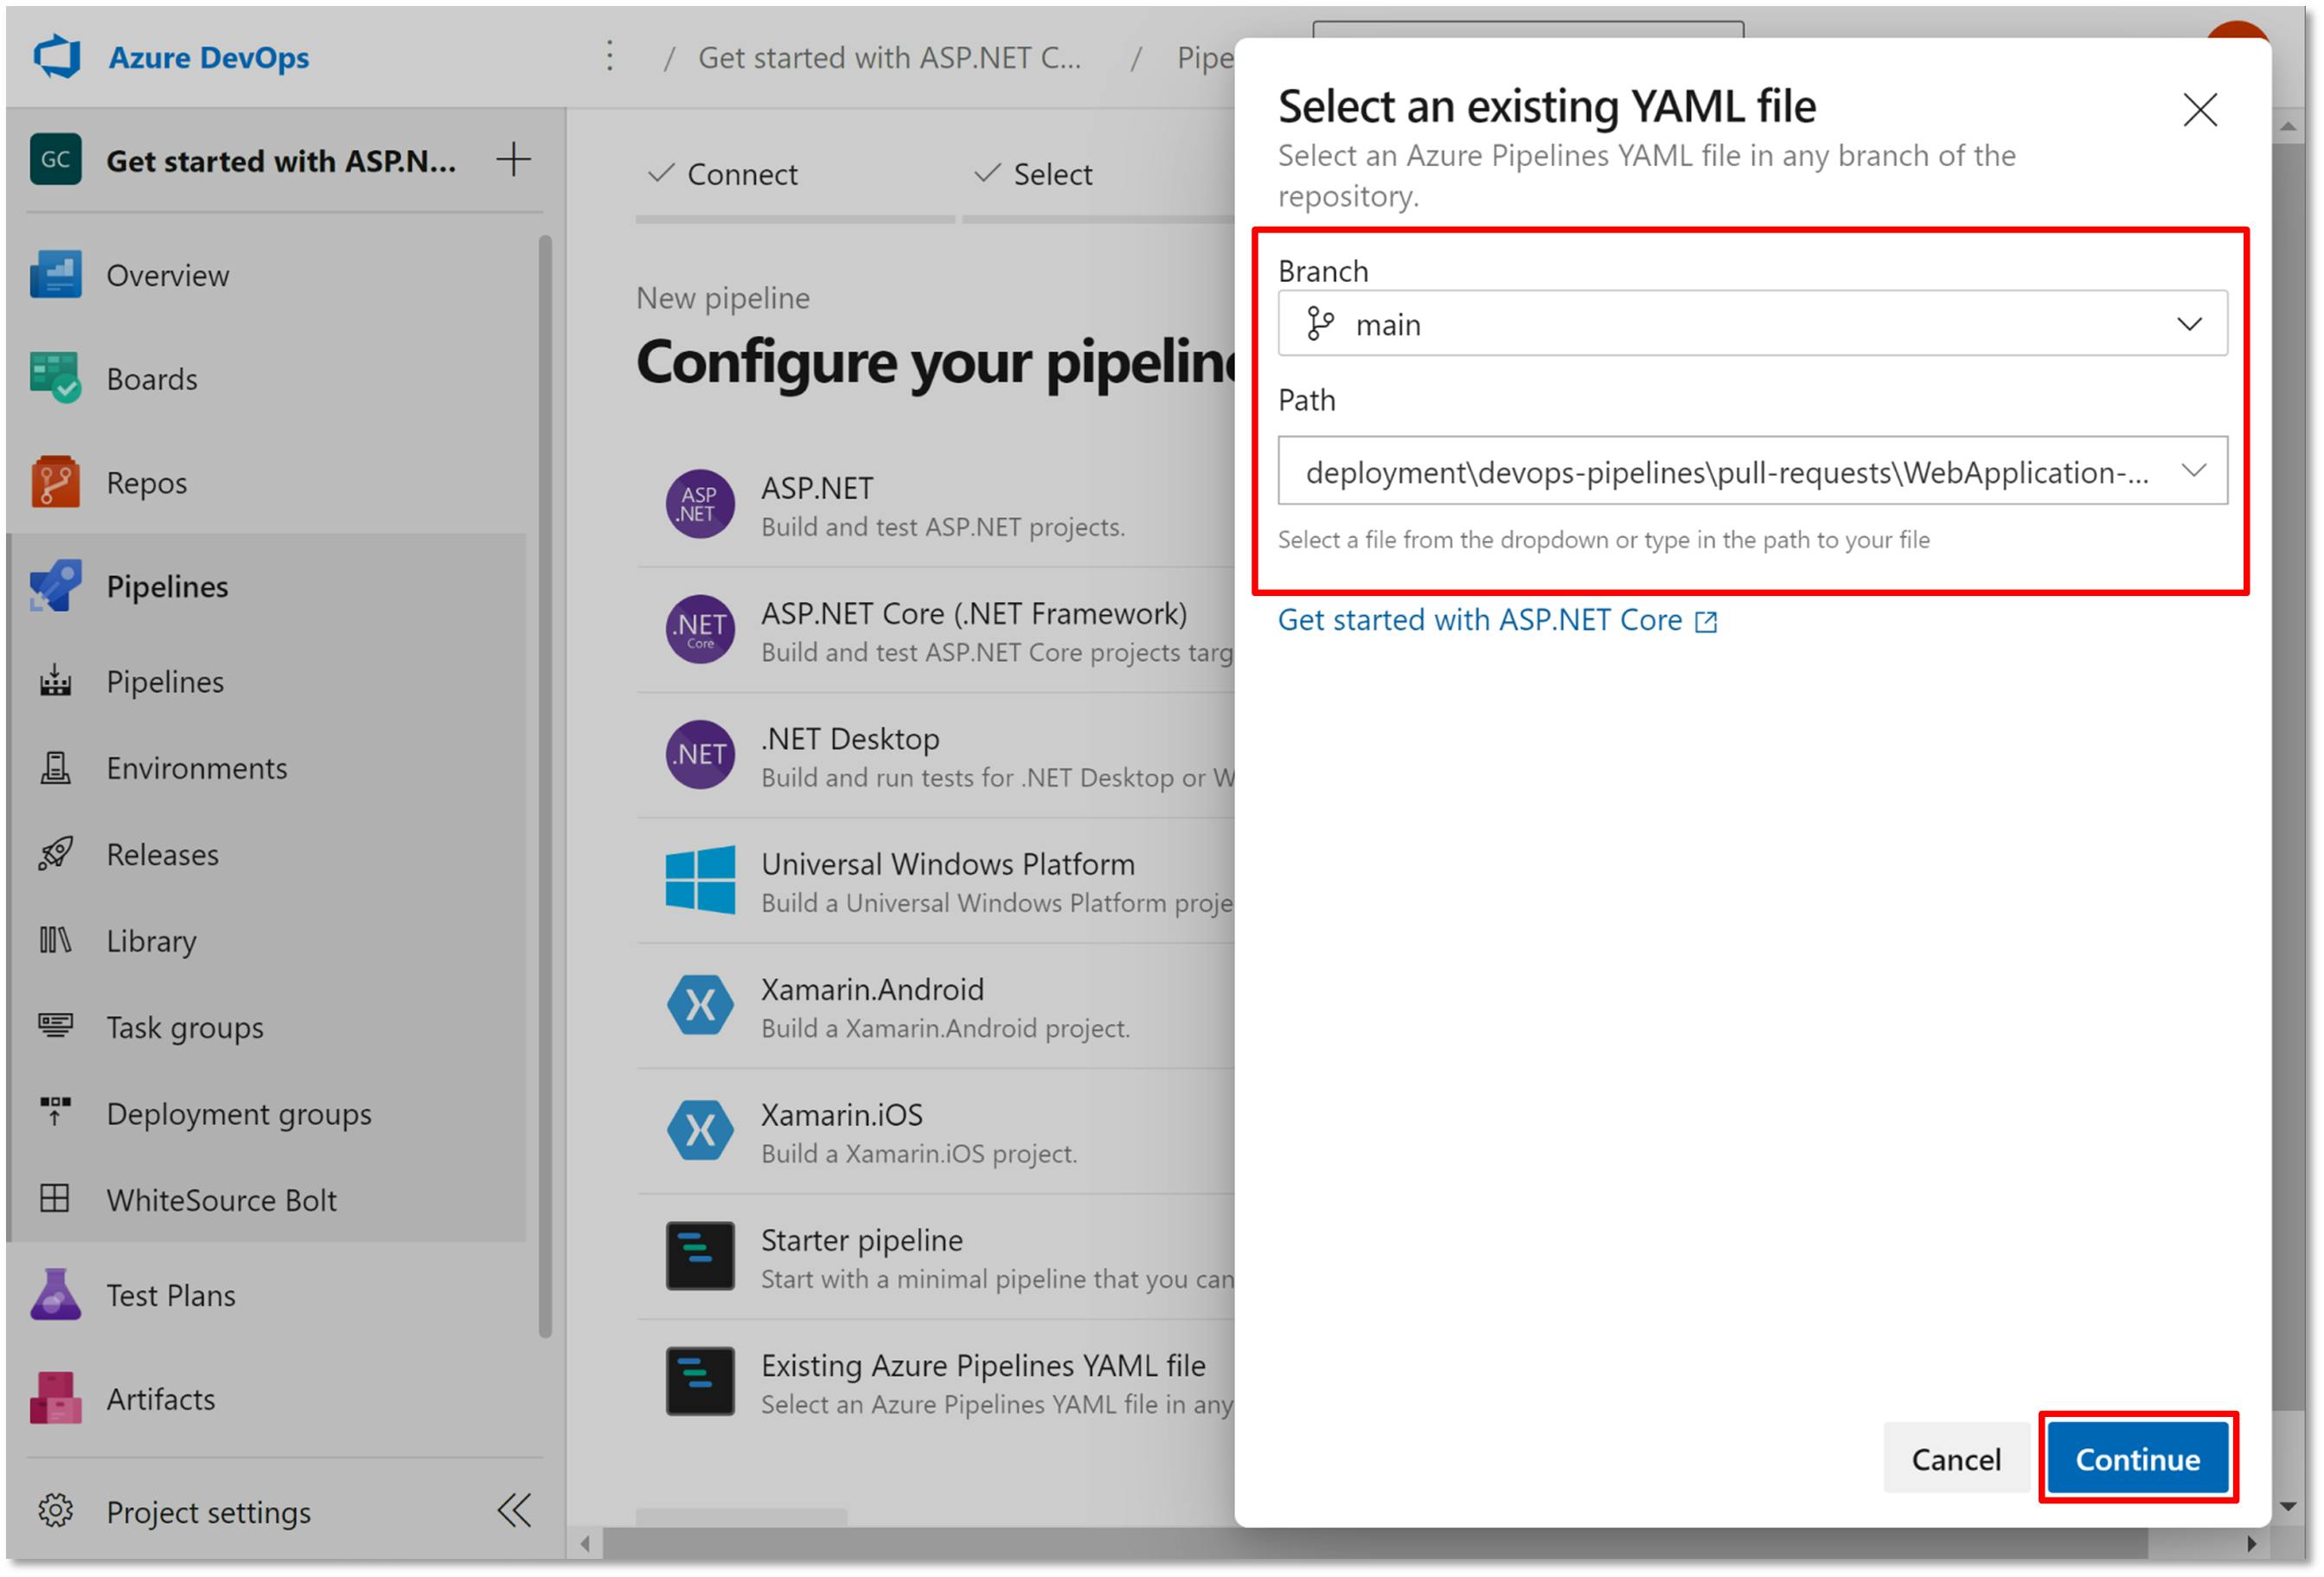
- Add in the YAML pipeline file path and click 'Continue'
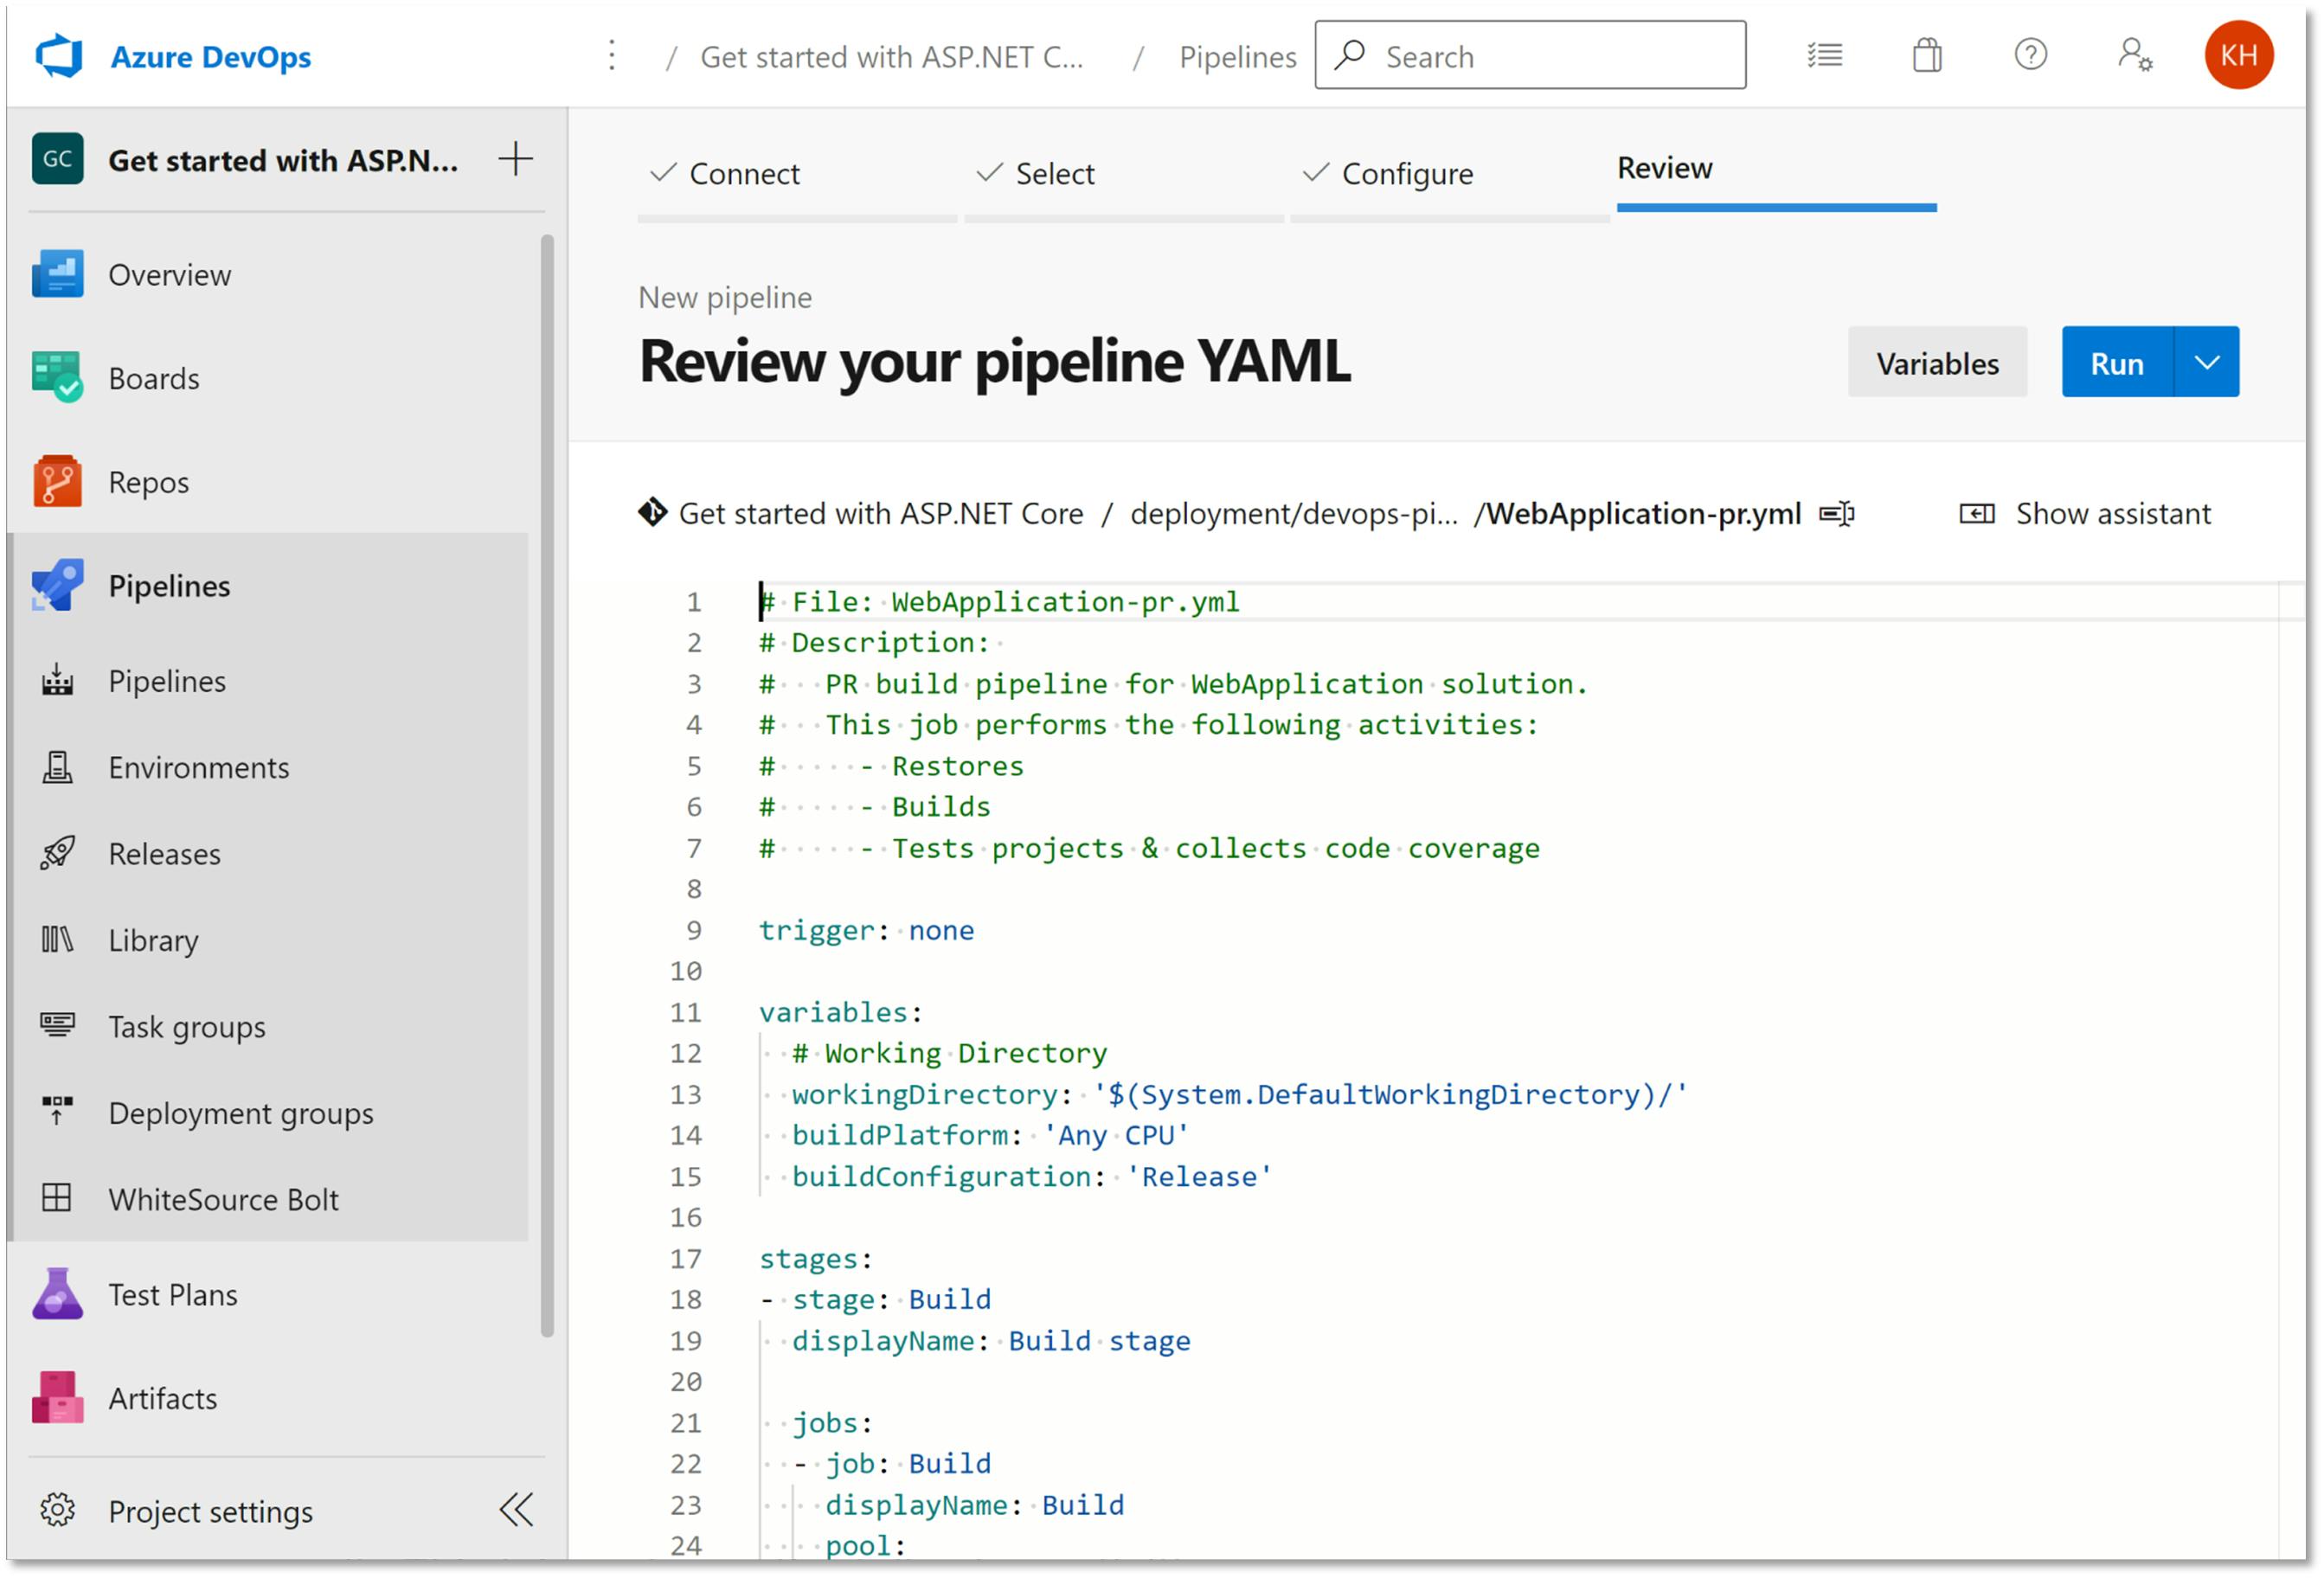
- Click on 'Run' to trigger the pipeline.
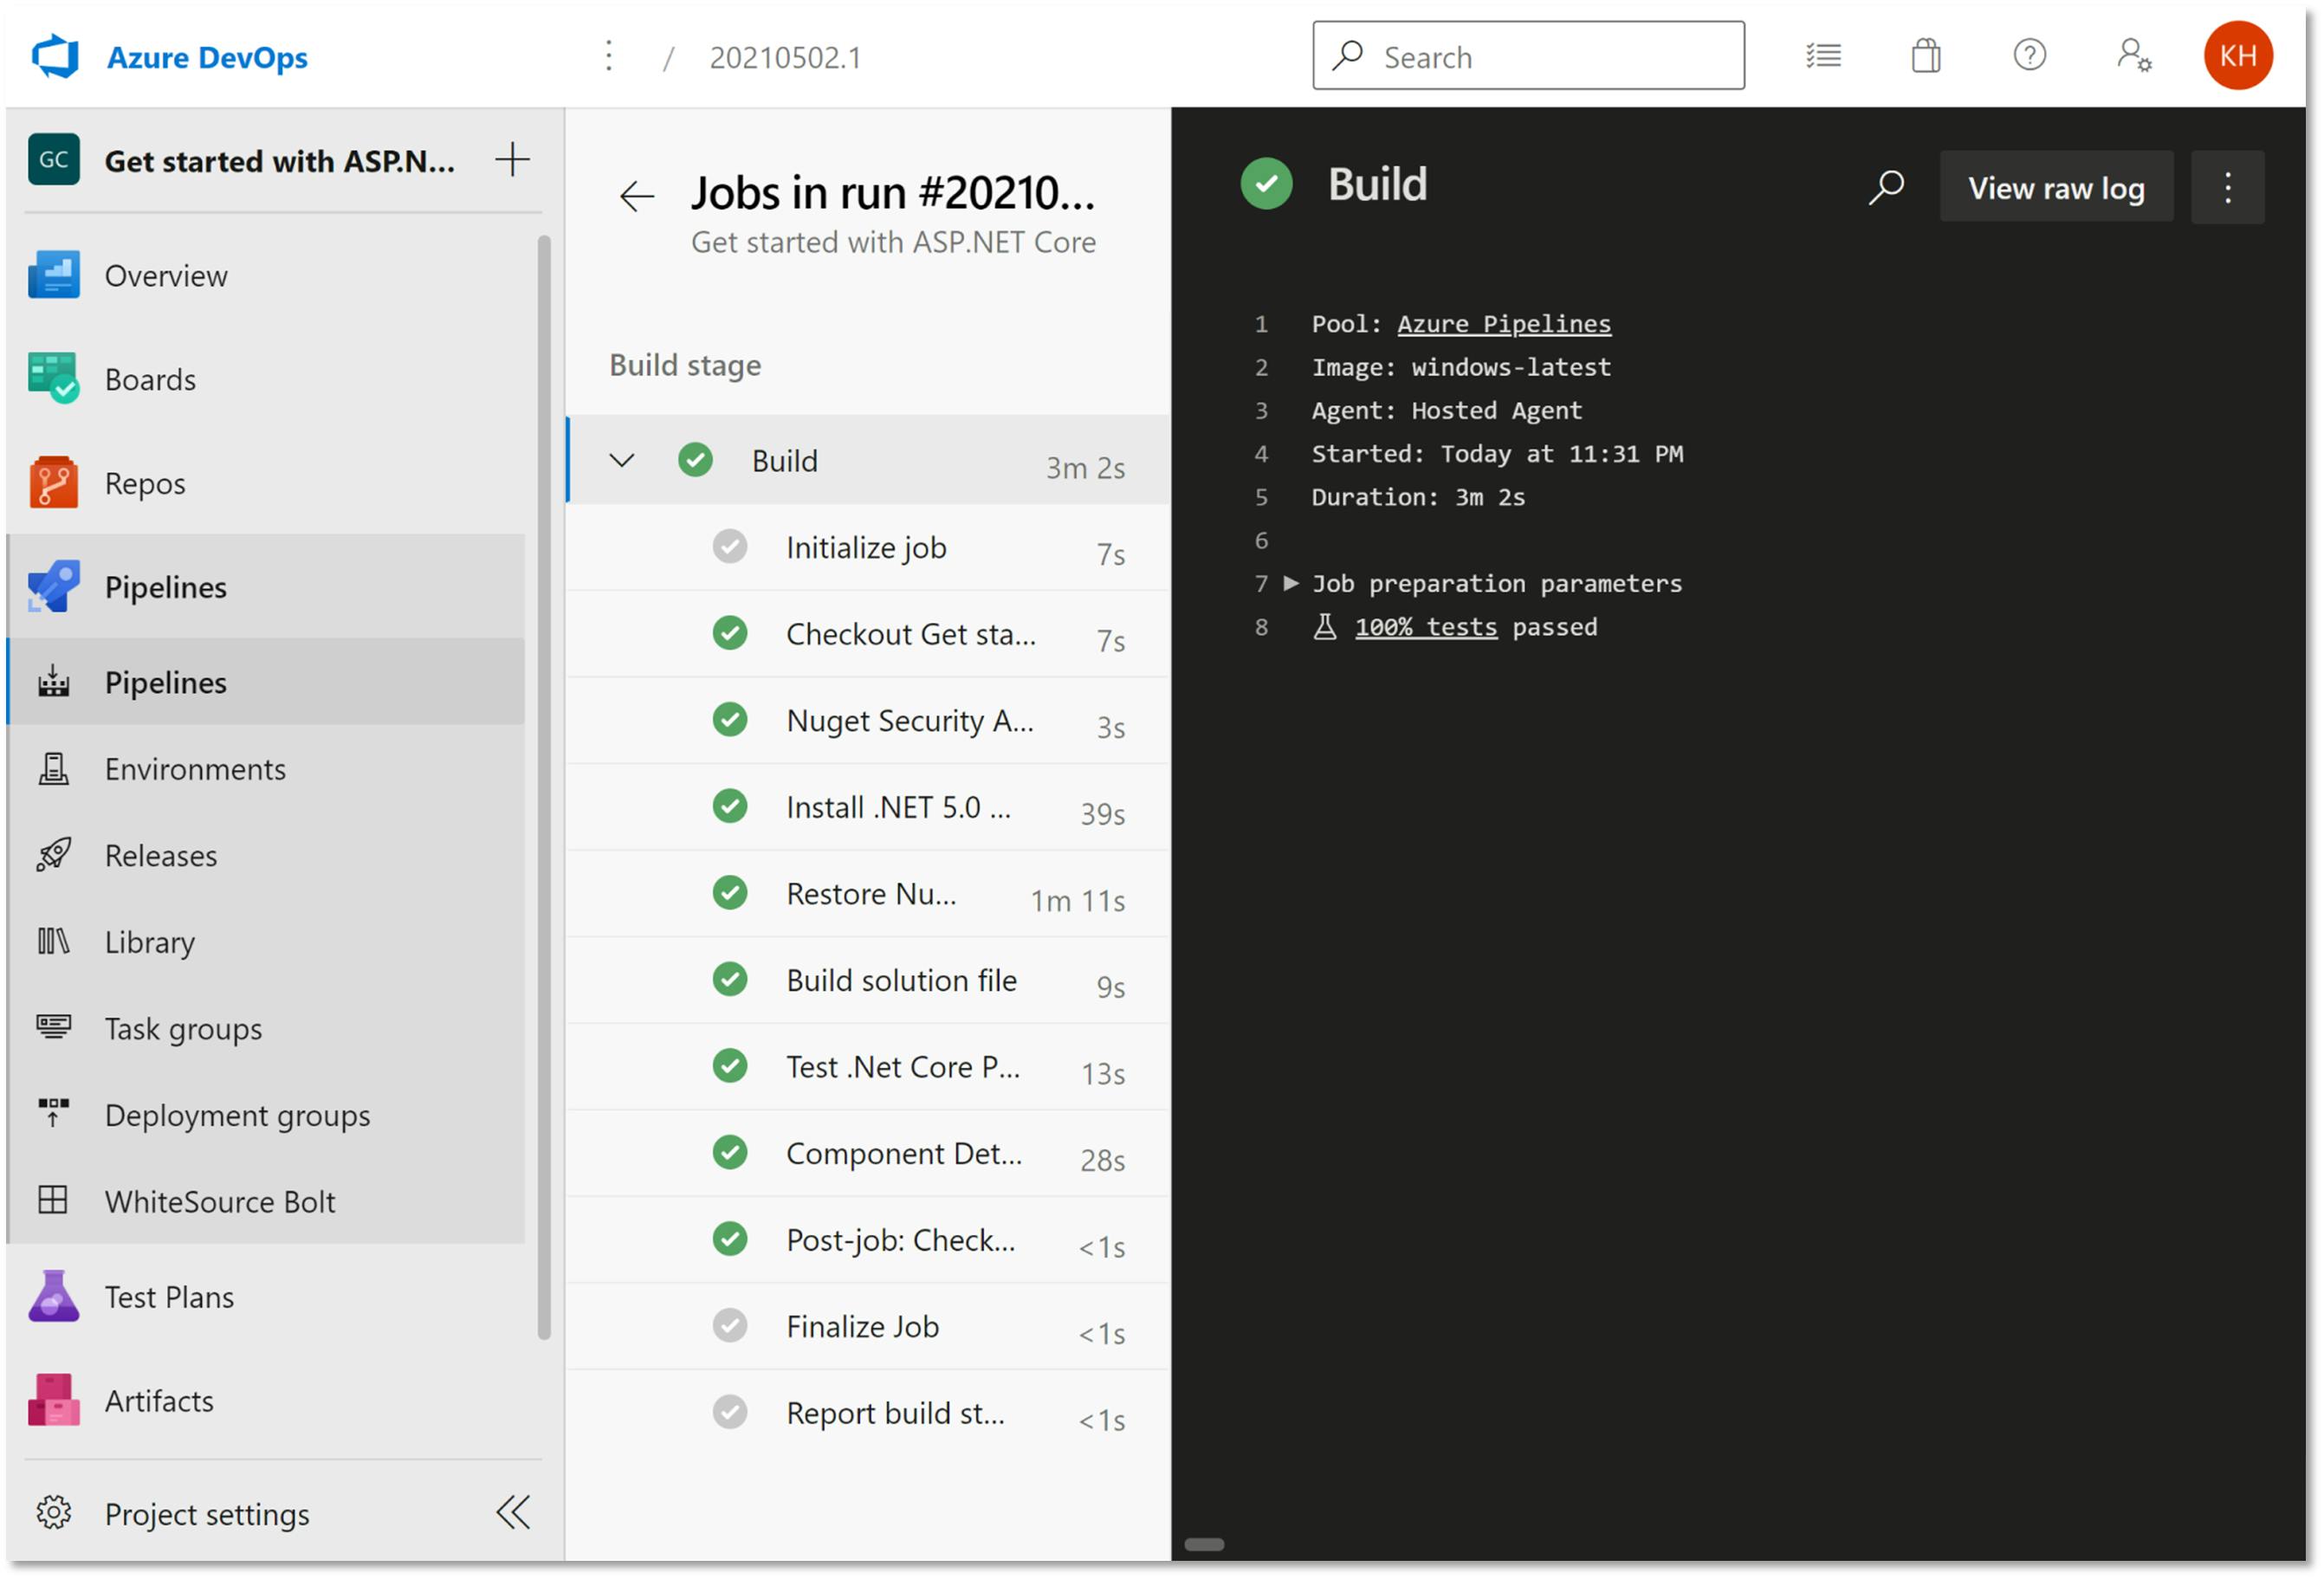
- This will queue the build and the build will be completed in some time.
- Navigate back and rename the pipeline to a more meaningful one, so that it's clear to identify.
Note: Please run the PR pipeline at least once before proceeding to the next step, as only in that case the pipeline will be visible on the Build Validation policy settings page.
Add build validation policy for master/main branch
Now that you have the PR pipeline ready and executed at least once, it's time to update the build validation policy for the master/main branch so that subsequent PRs will result in the pipeline being executed and completed successfully for the PR to be merged.
To add the build validation policy,
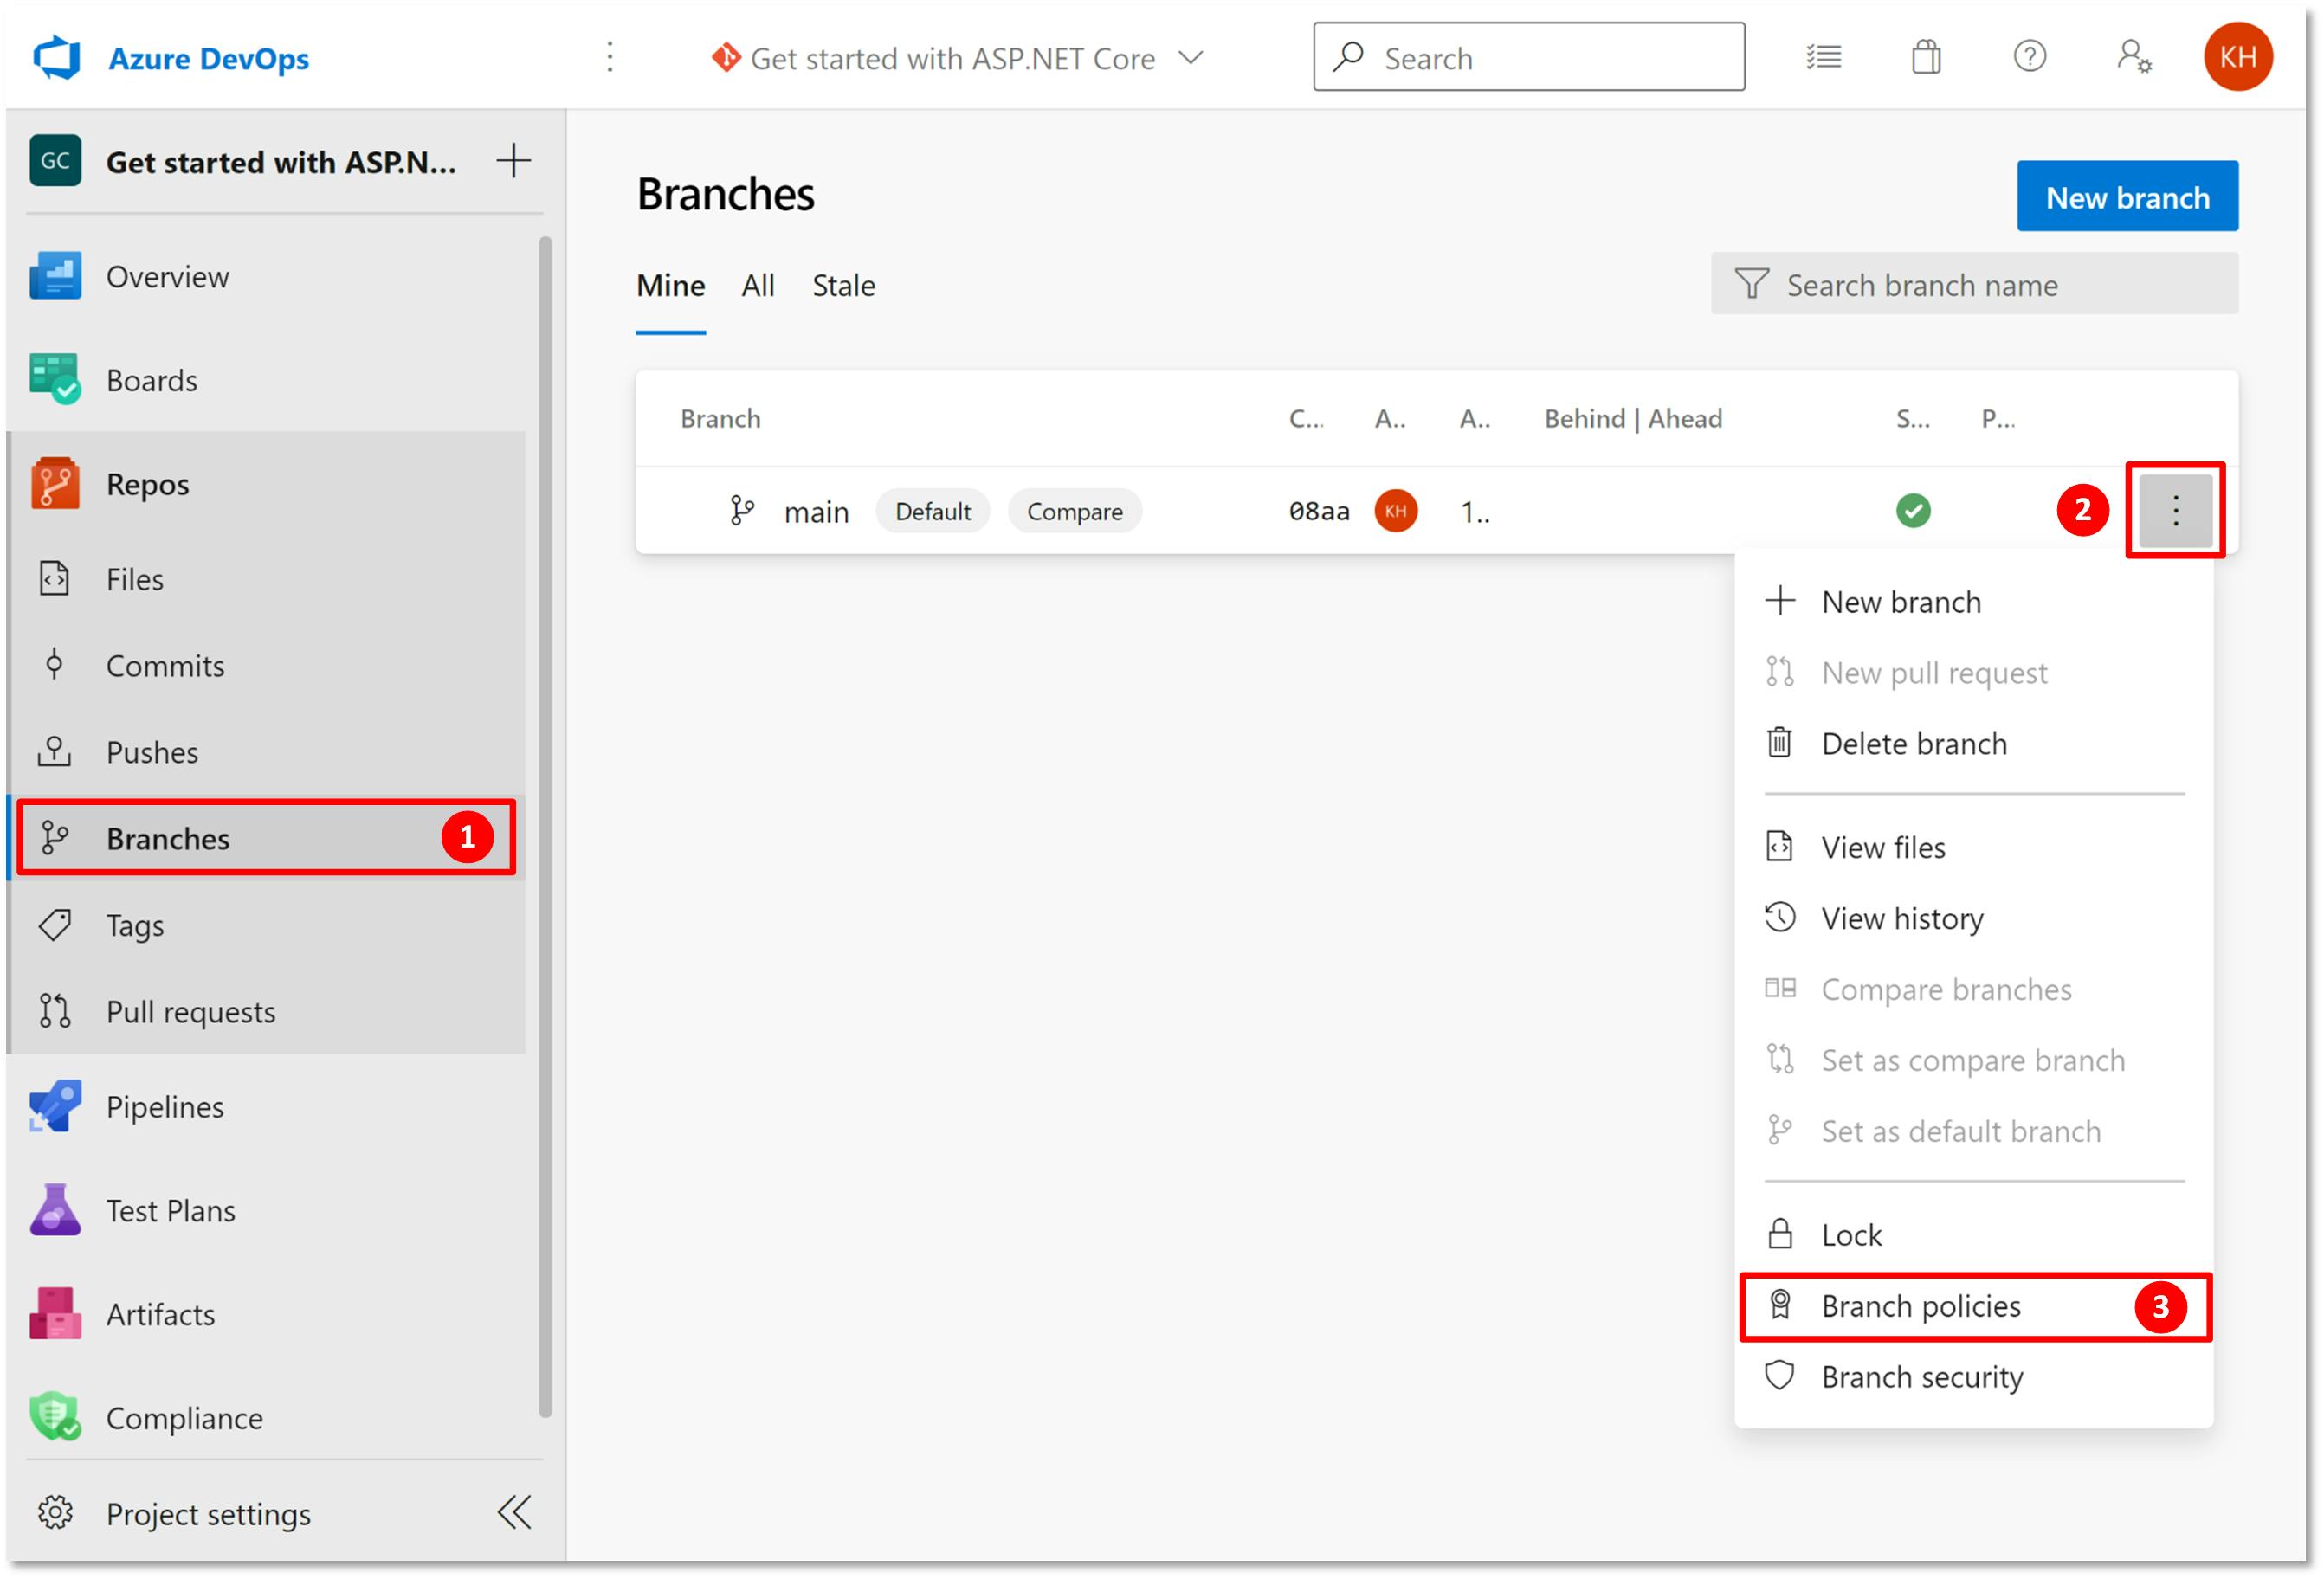
- Navigate to 'Branches' under 'Repos' in Azure DevOps. Click on the kebab menu icon against the master/main branch and select 'Branch Policies' from the context menu.
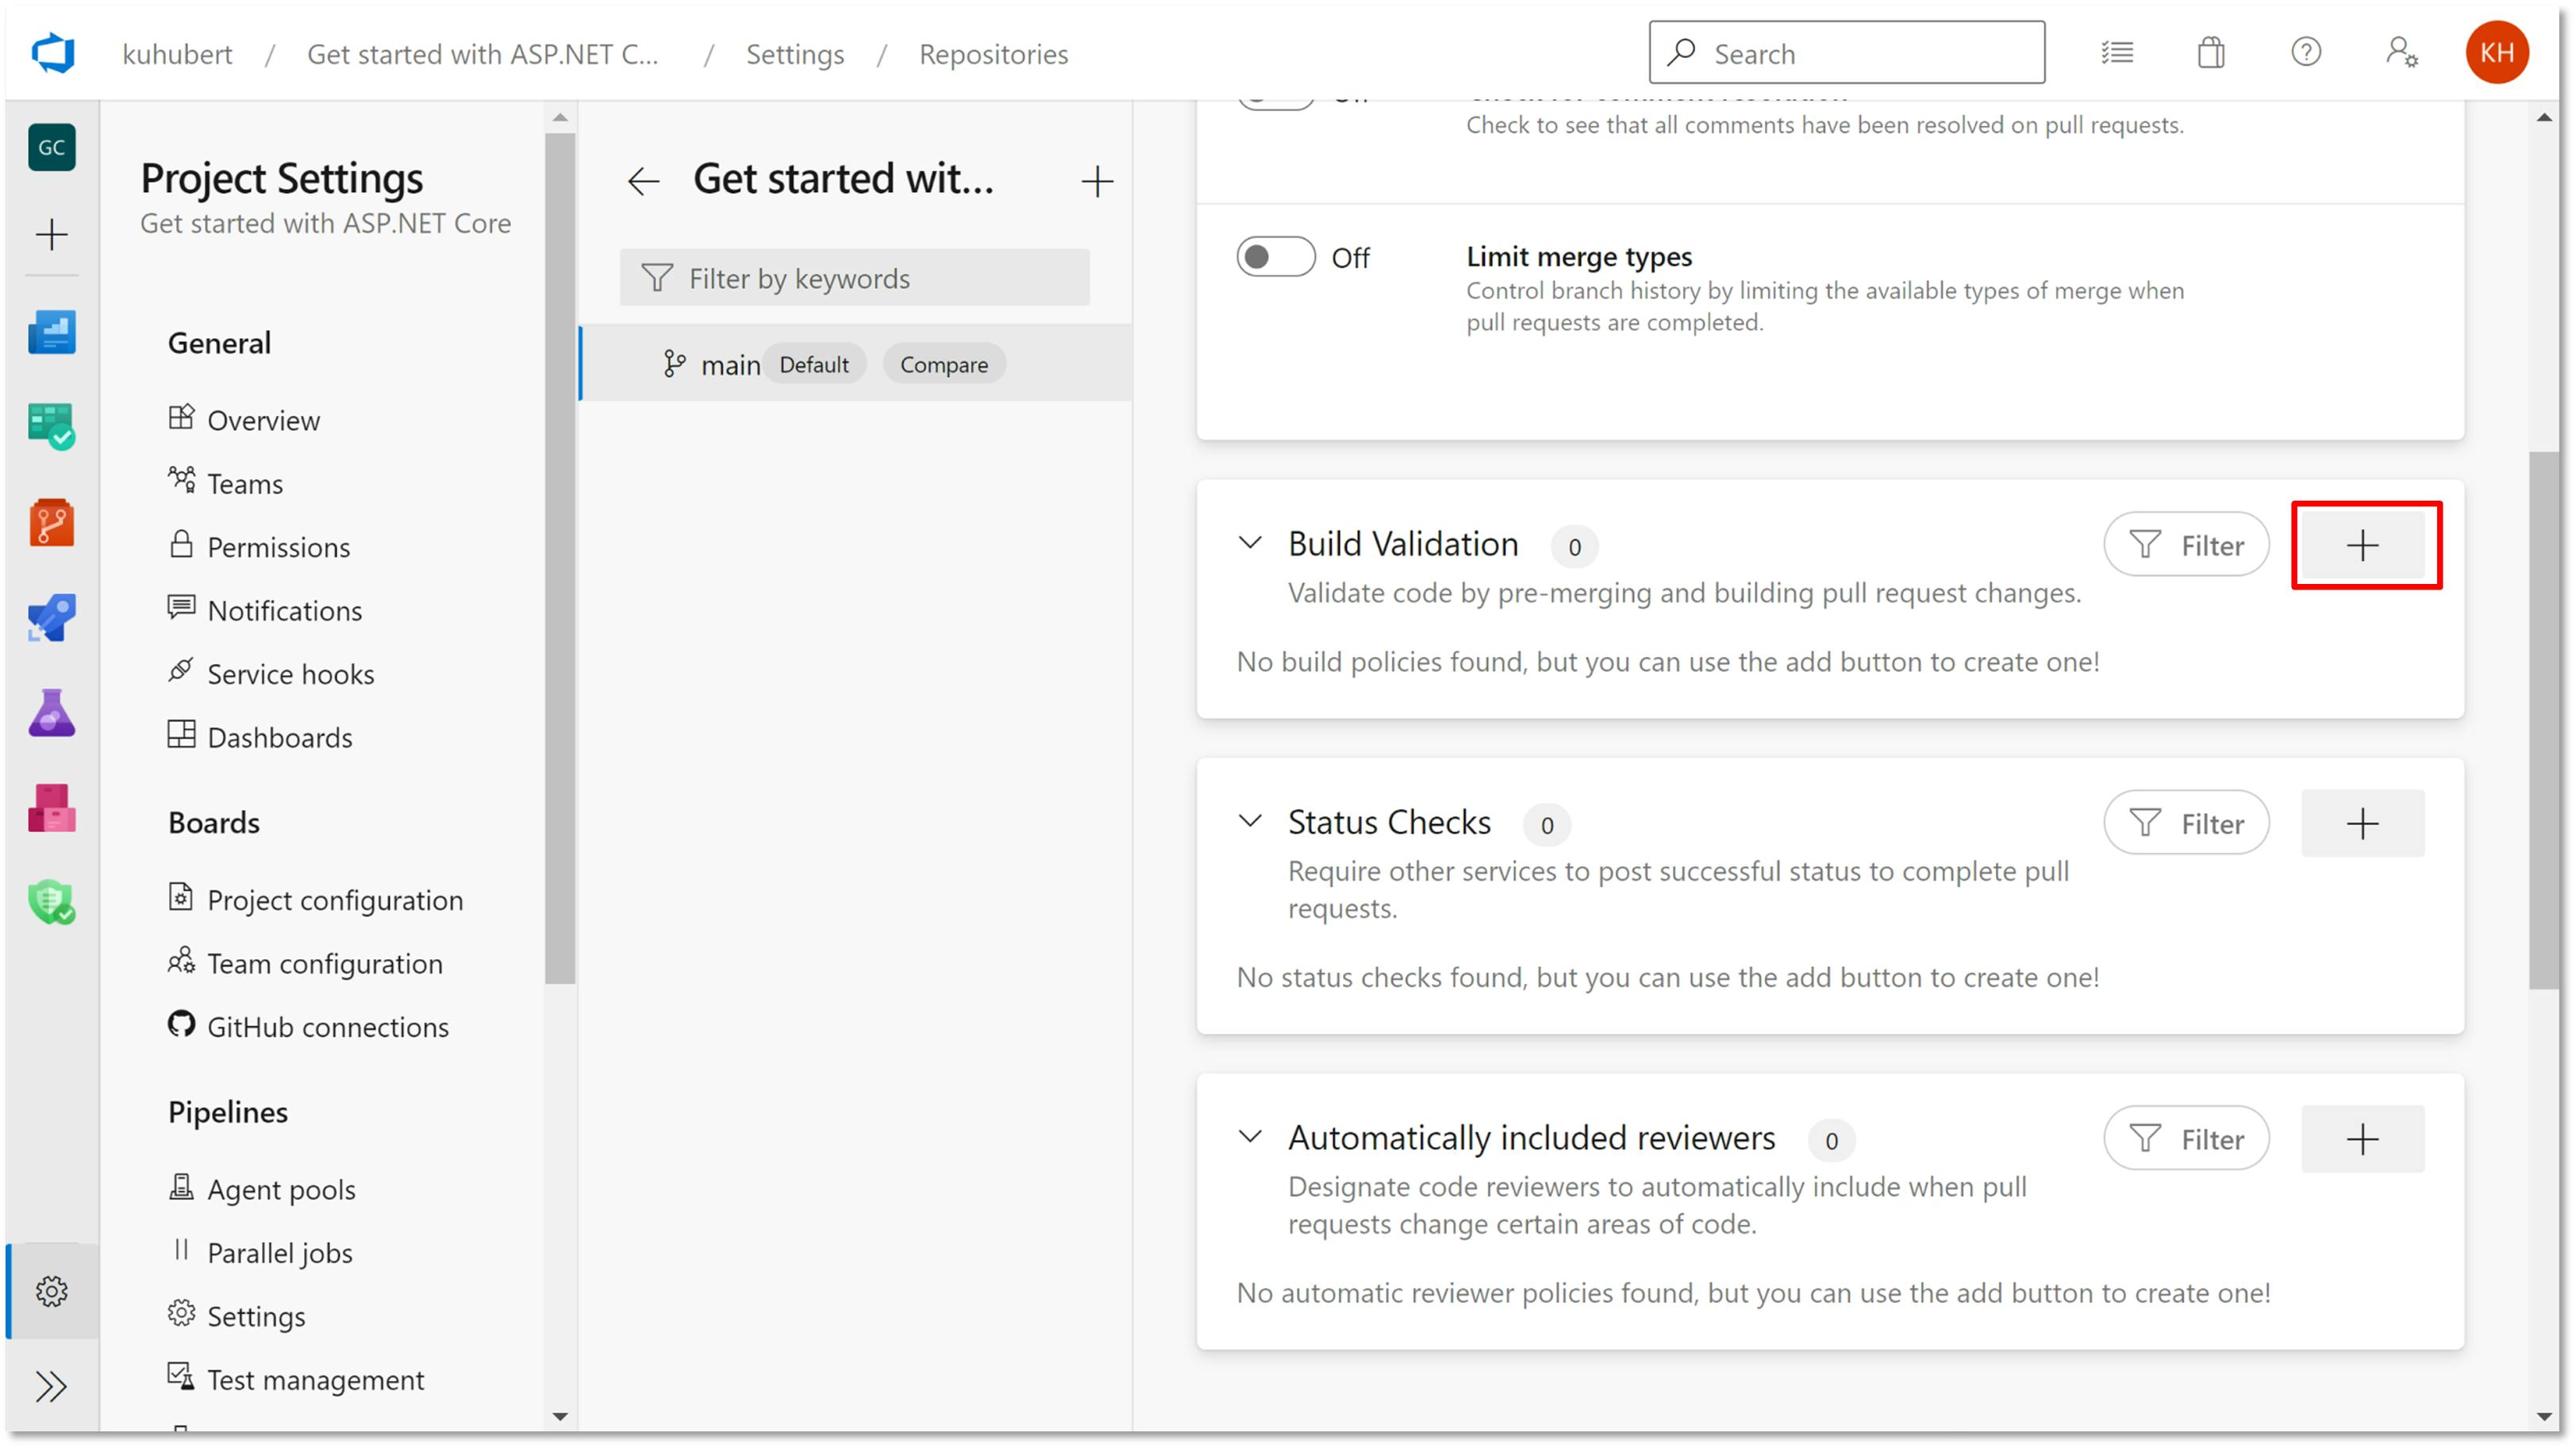
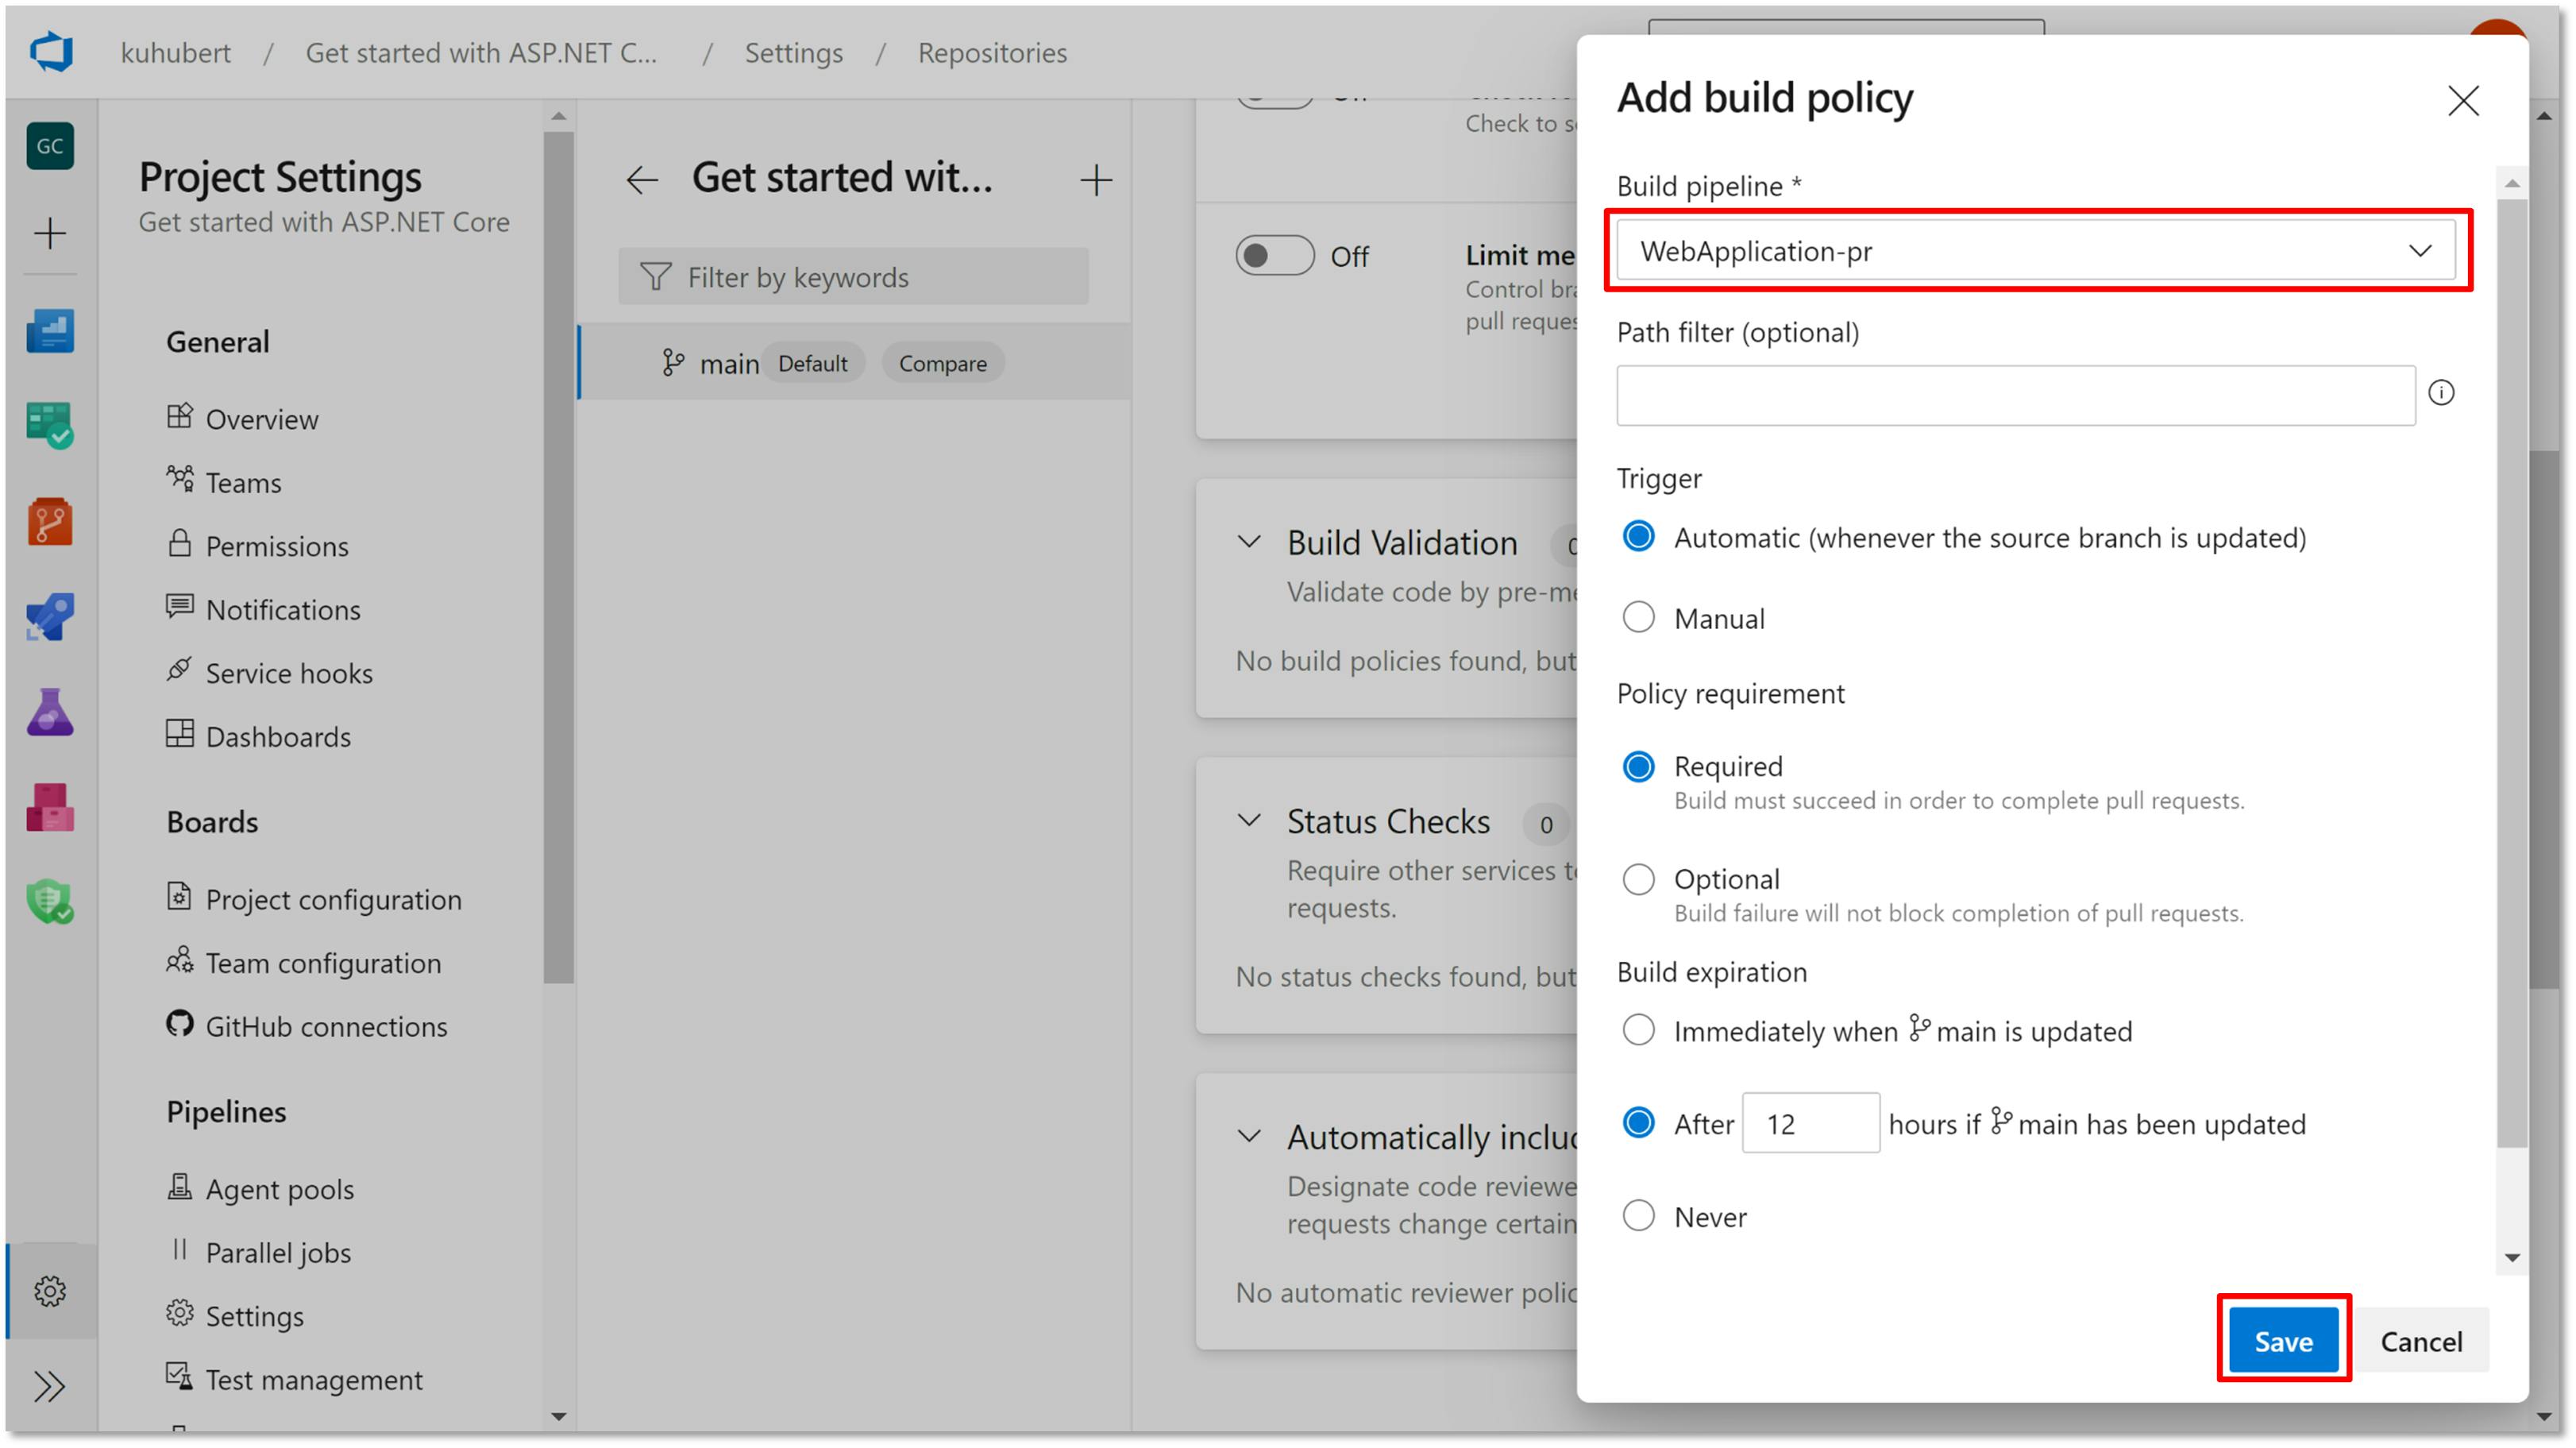
- In the branch policies settings page, Add a 'Build Validation' policy. Select the PR pipeline that ran earlier from the dropdown of the policy page. Review other settings and click 'Save' to enable the build validation.
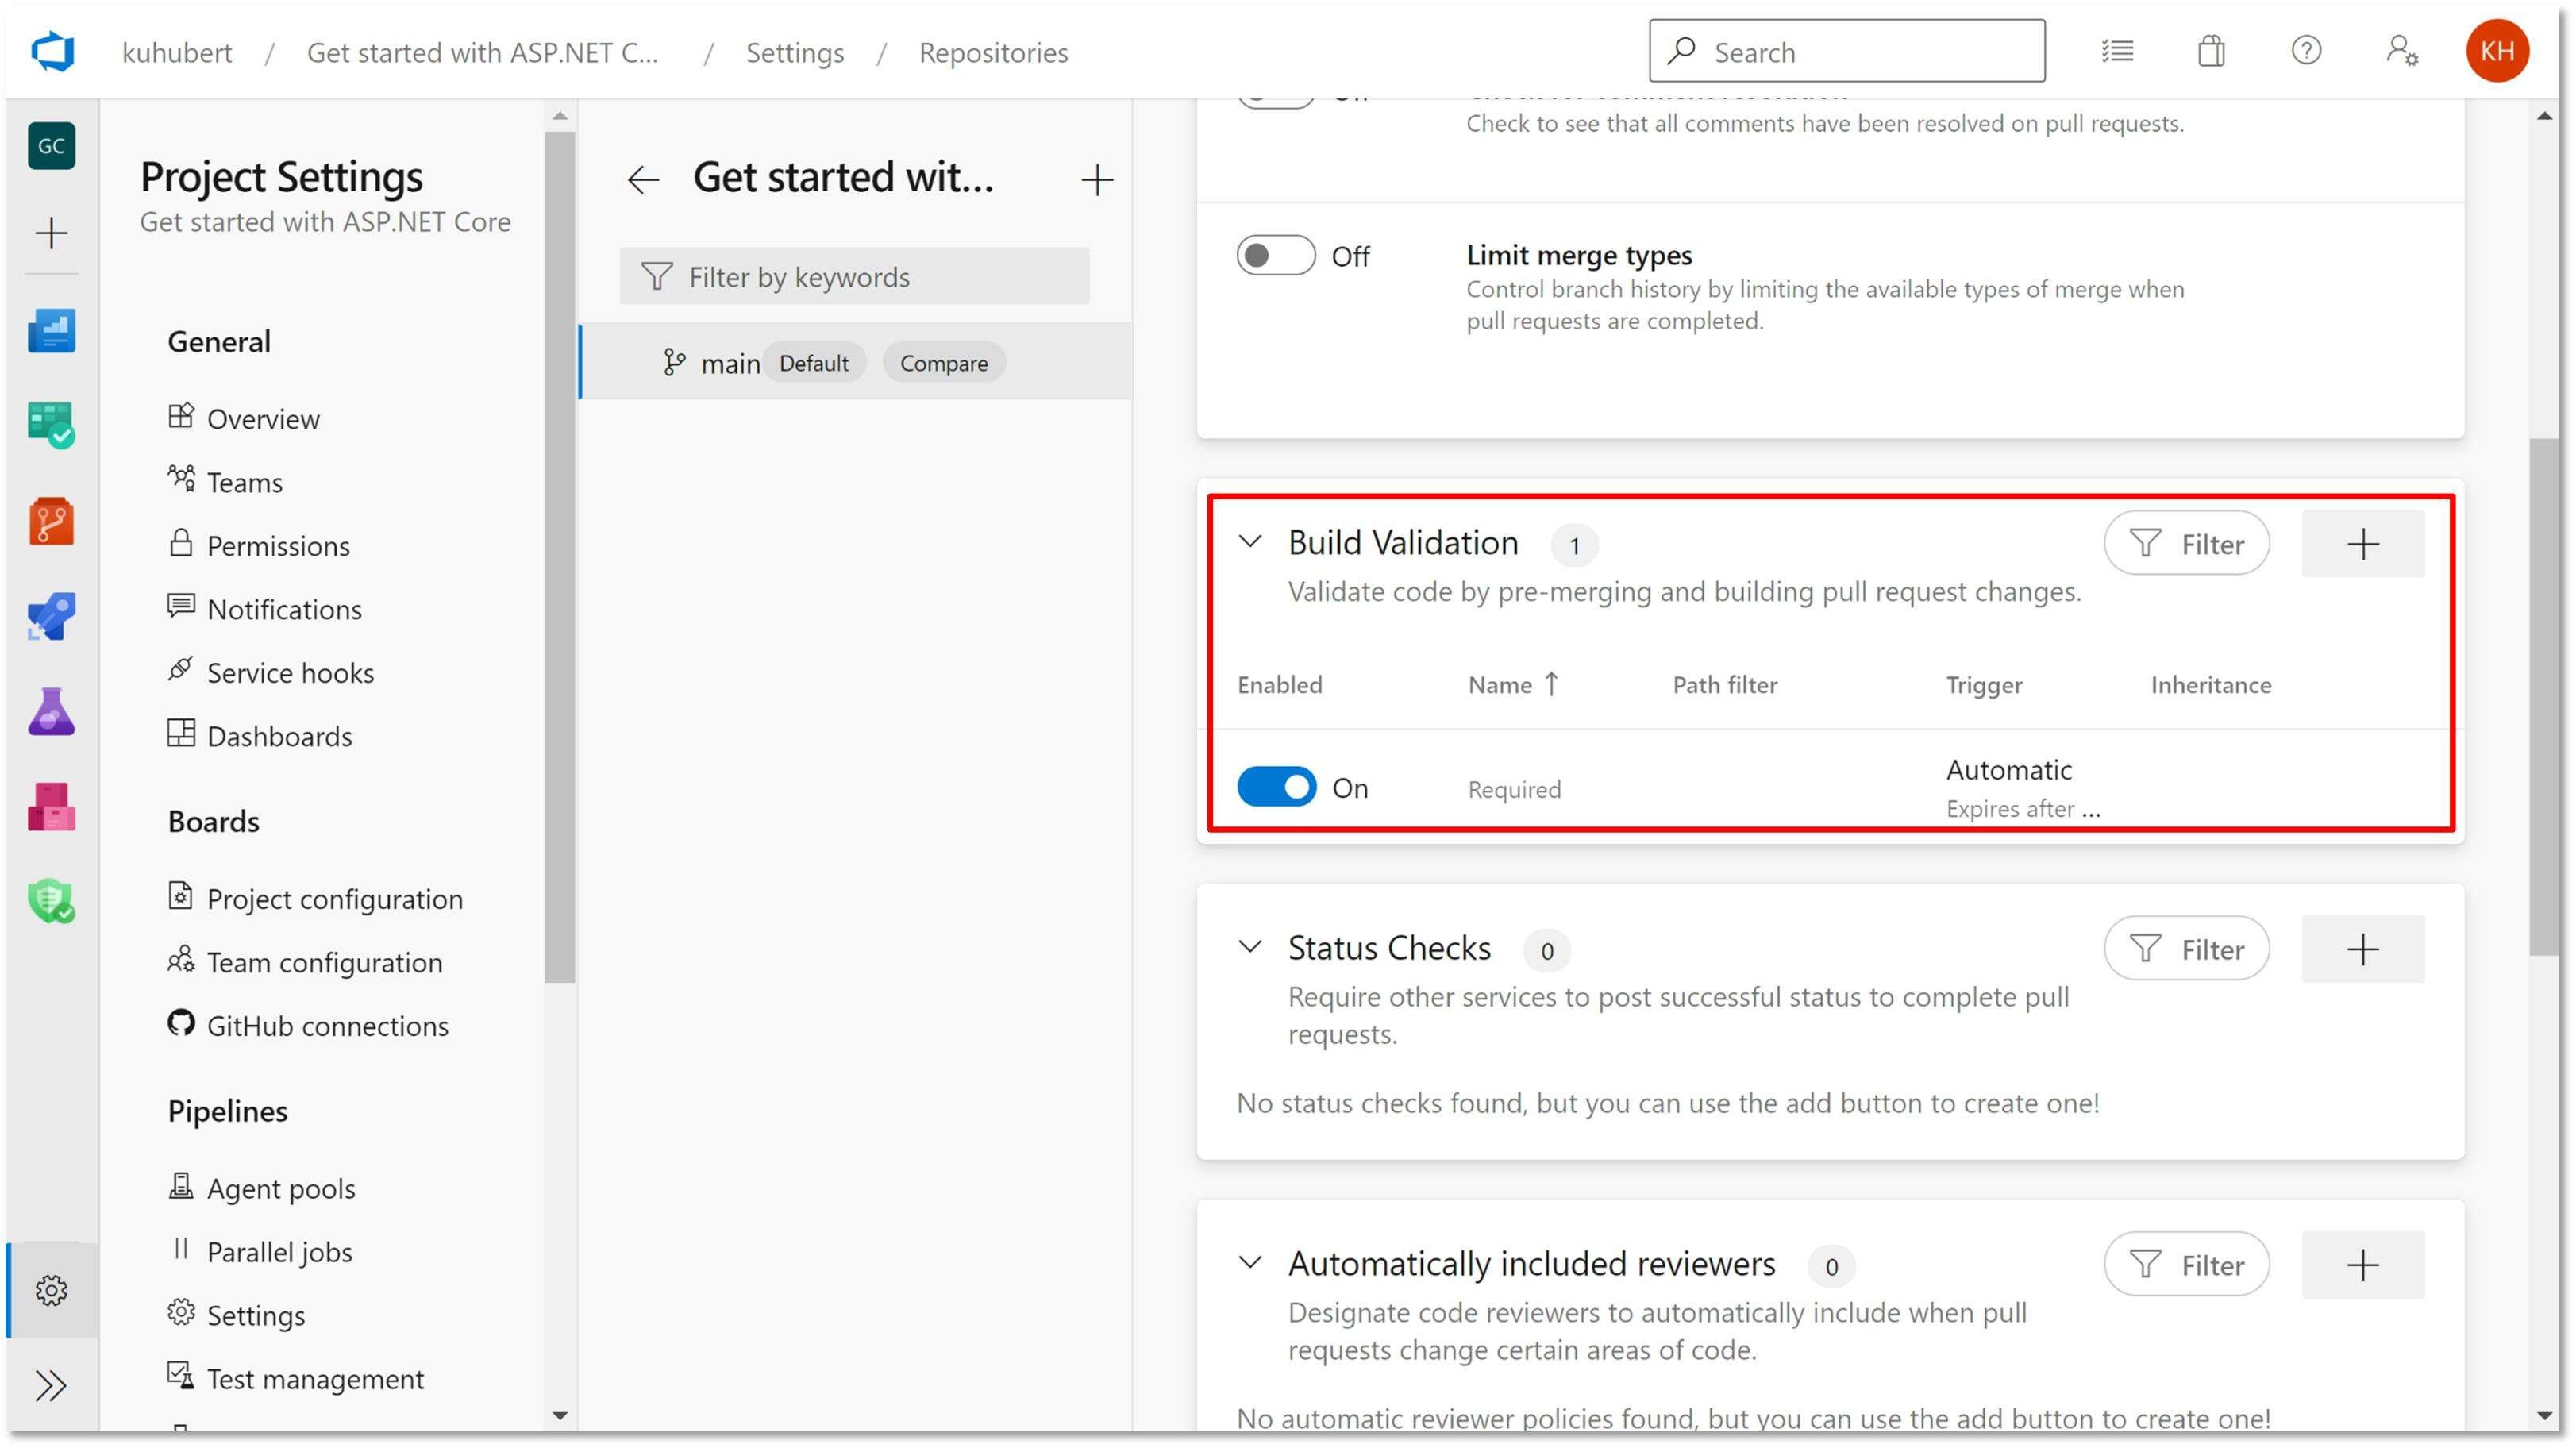
- Build Validation policy is now in place and future PRs will require this build validation to pass i.e. the PR pipeline to run successfully.
Create PRs & test it
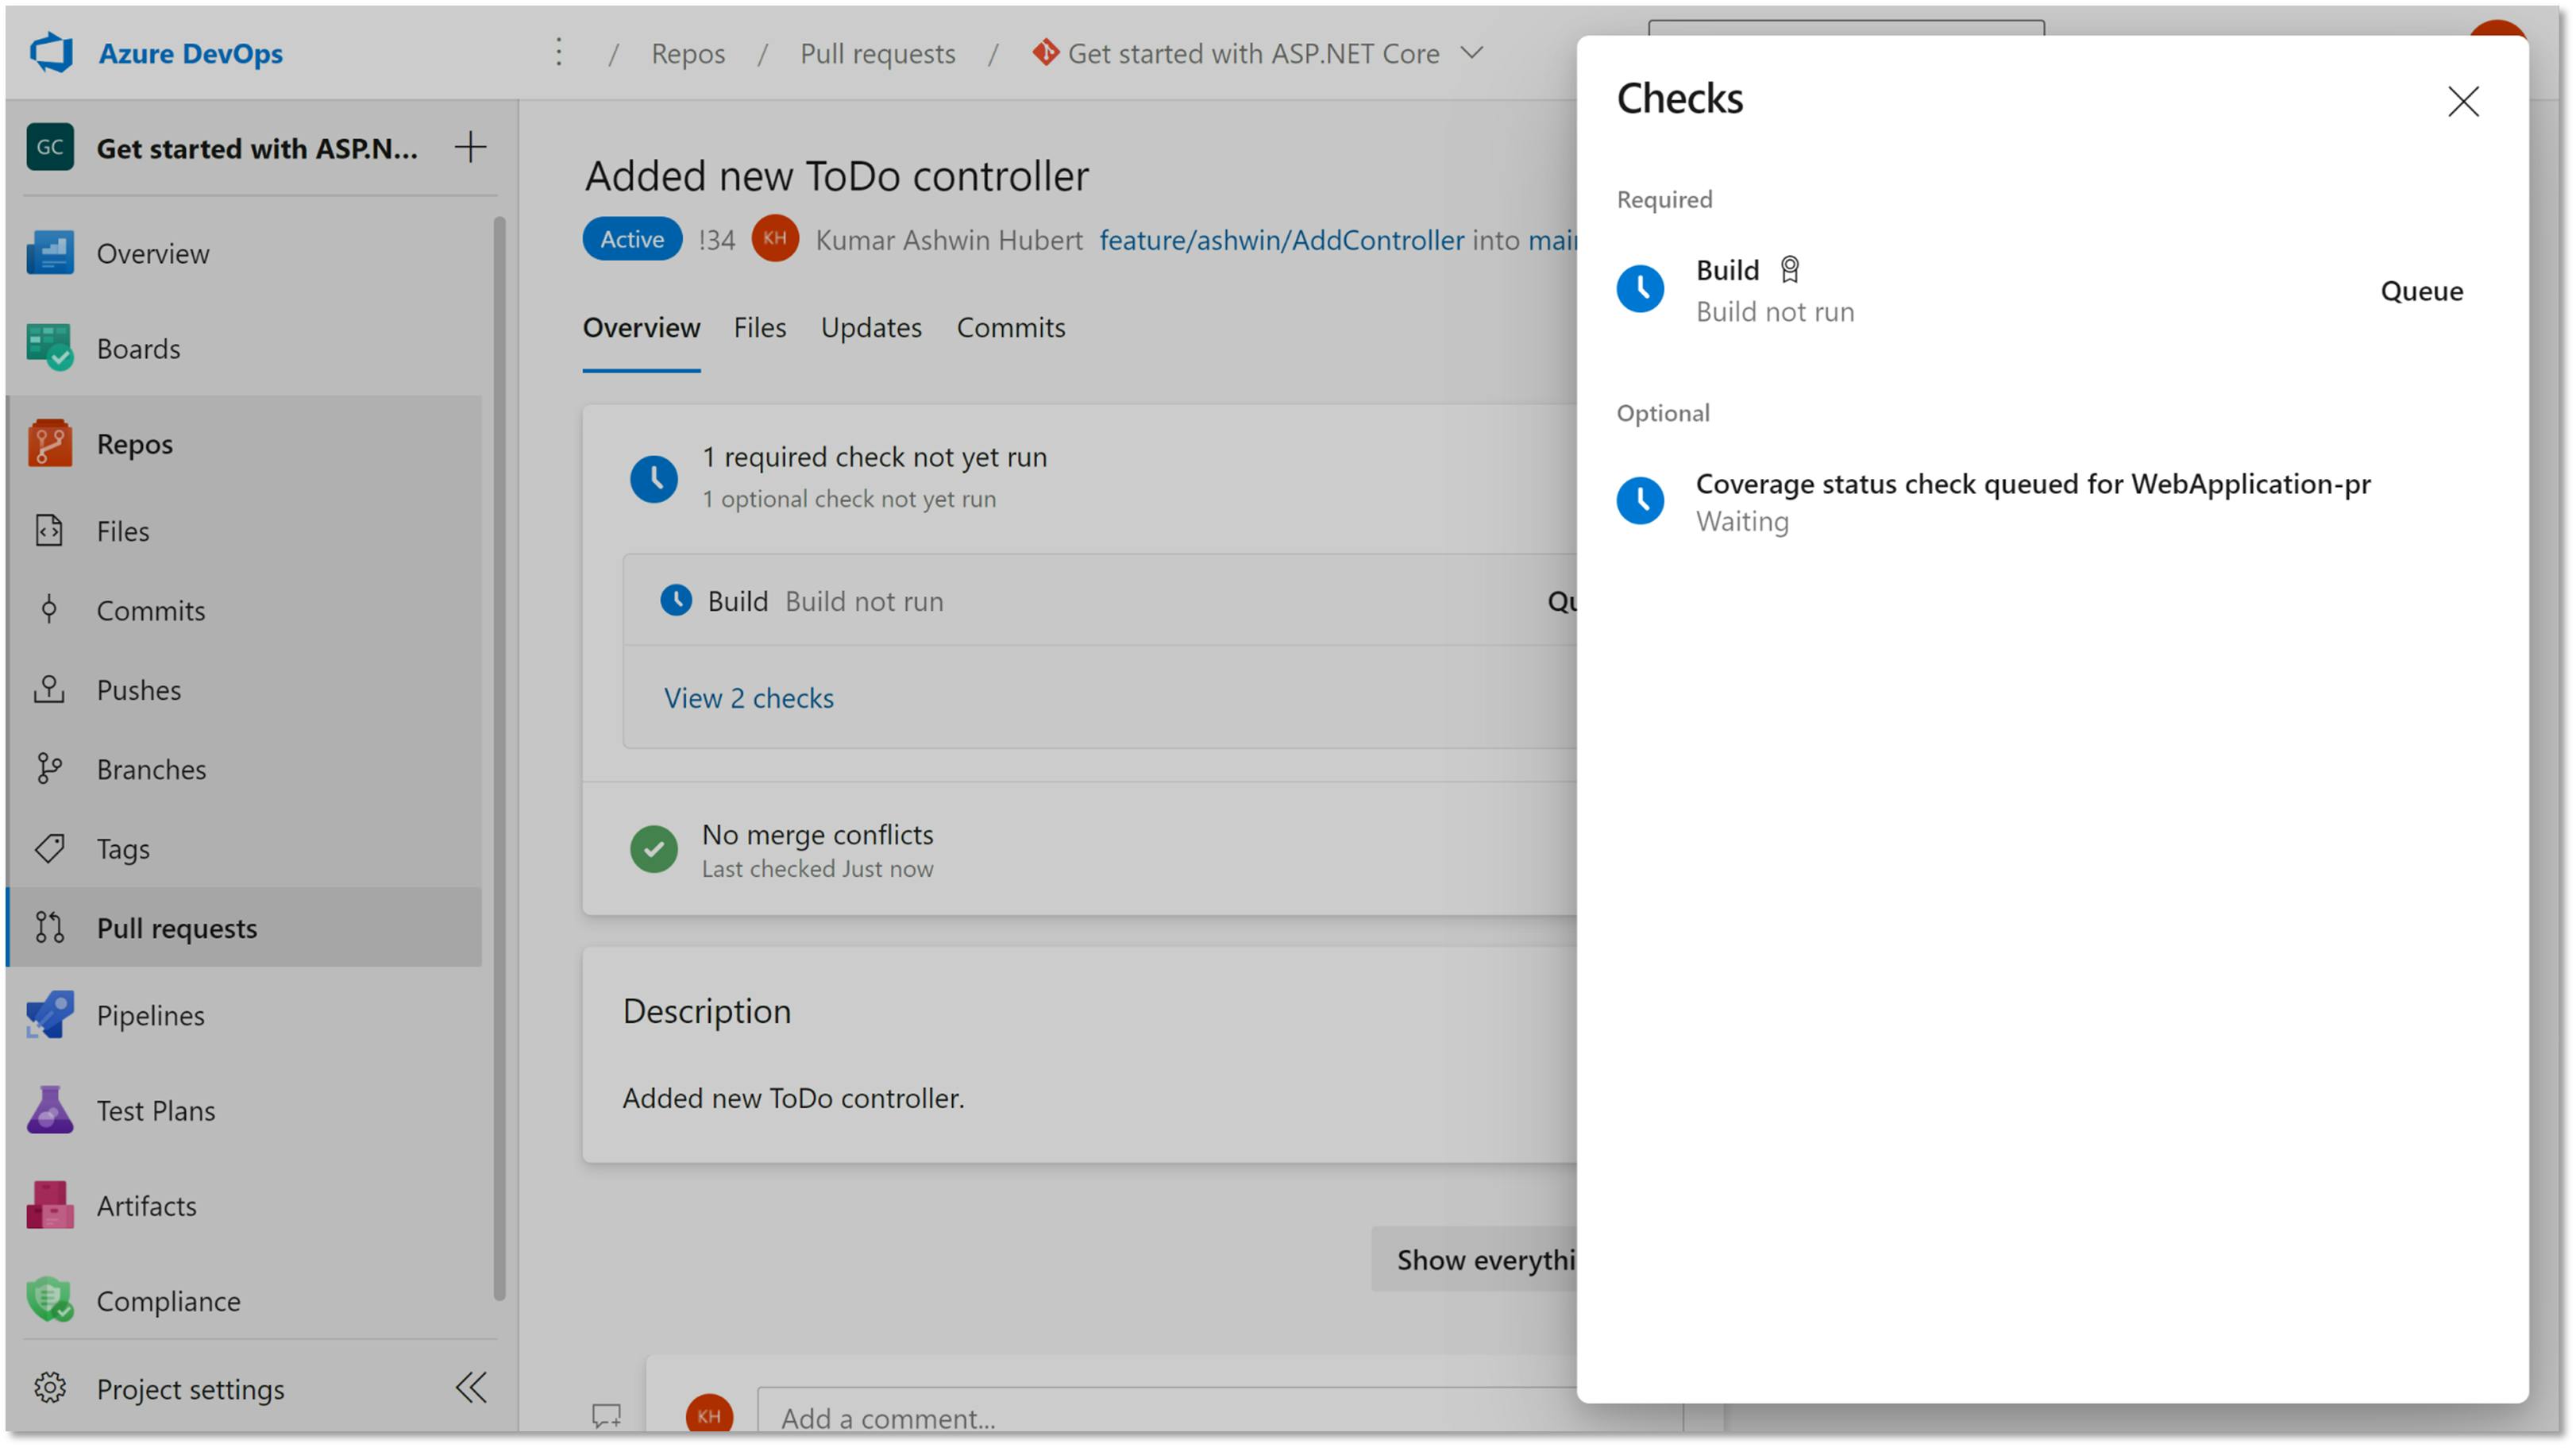
Create a Pull Request and the pipeline should get triggered automatically as part of the 'Required' checks.
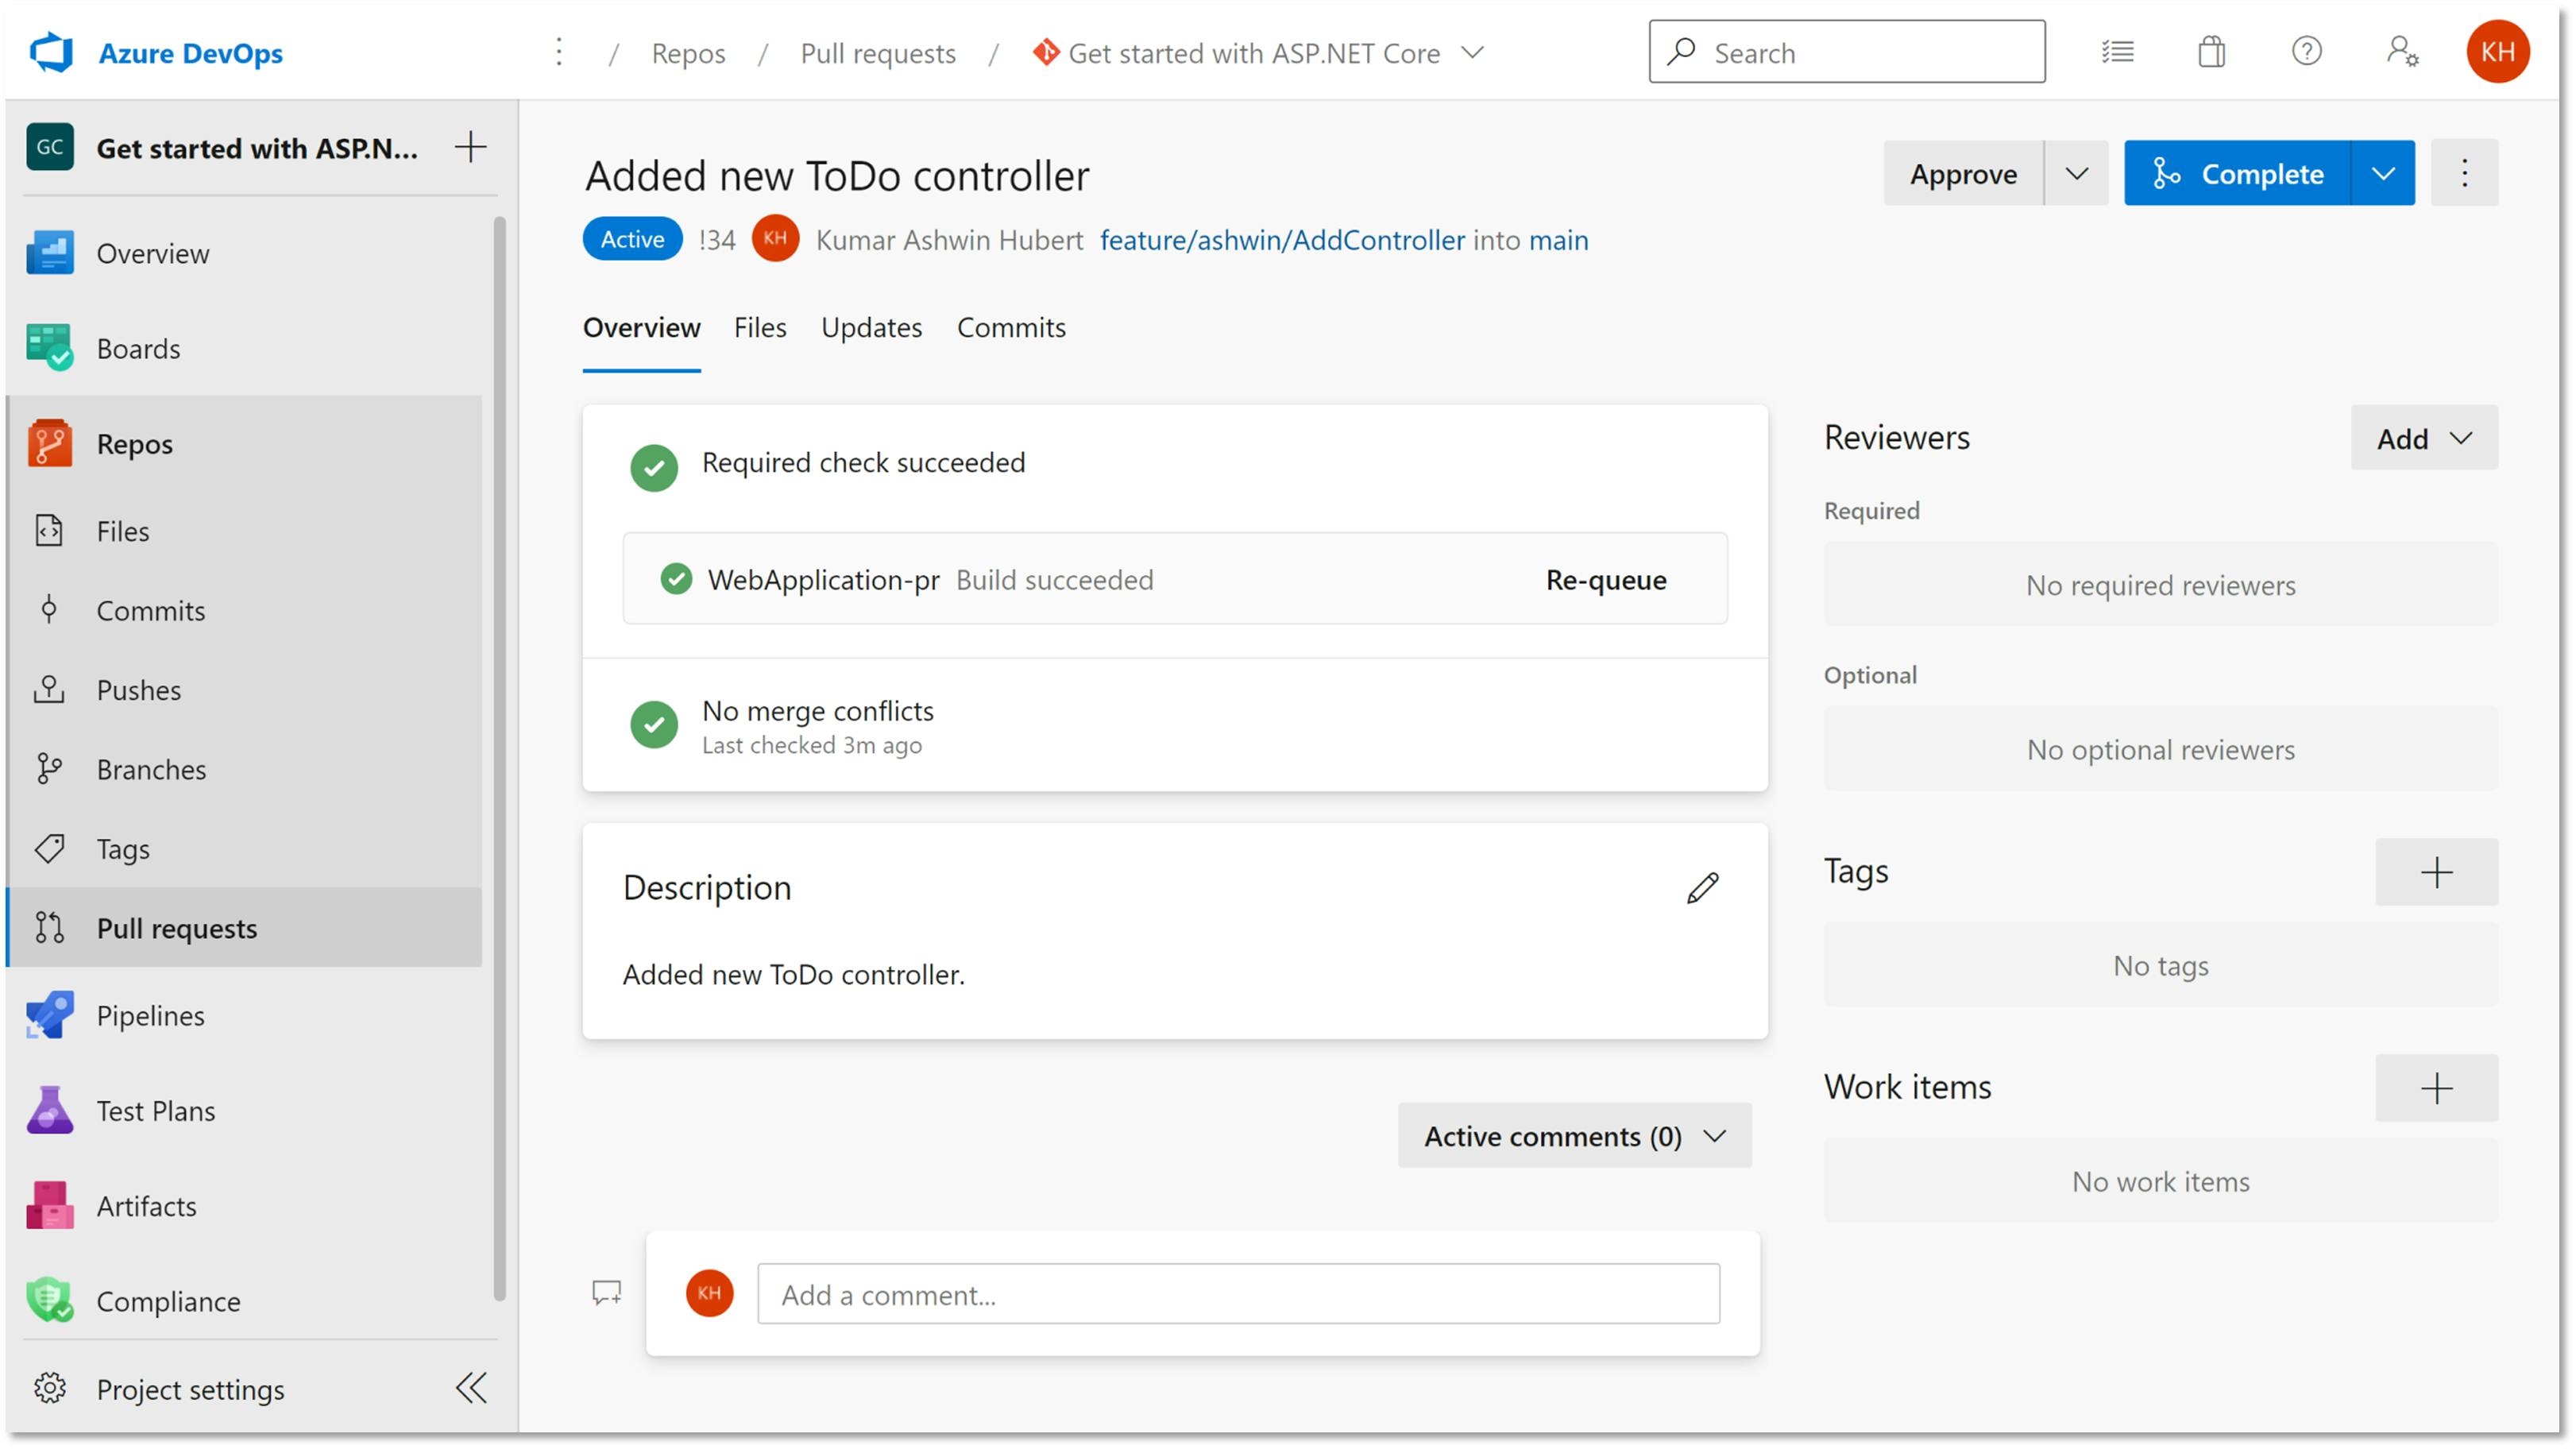
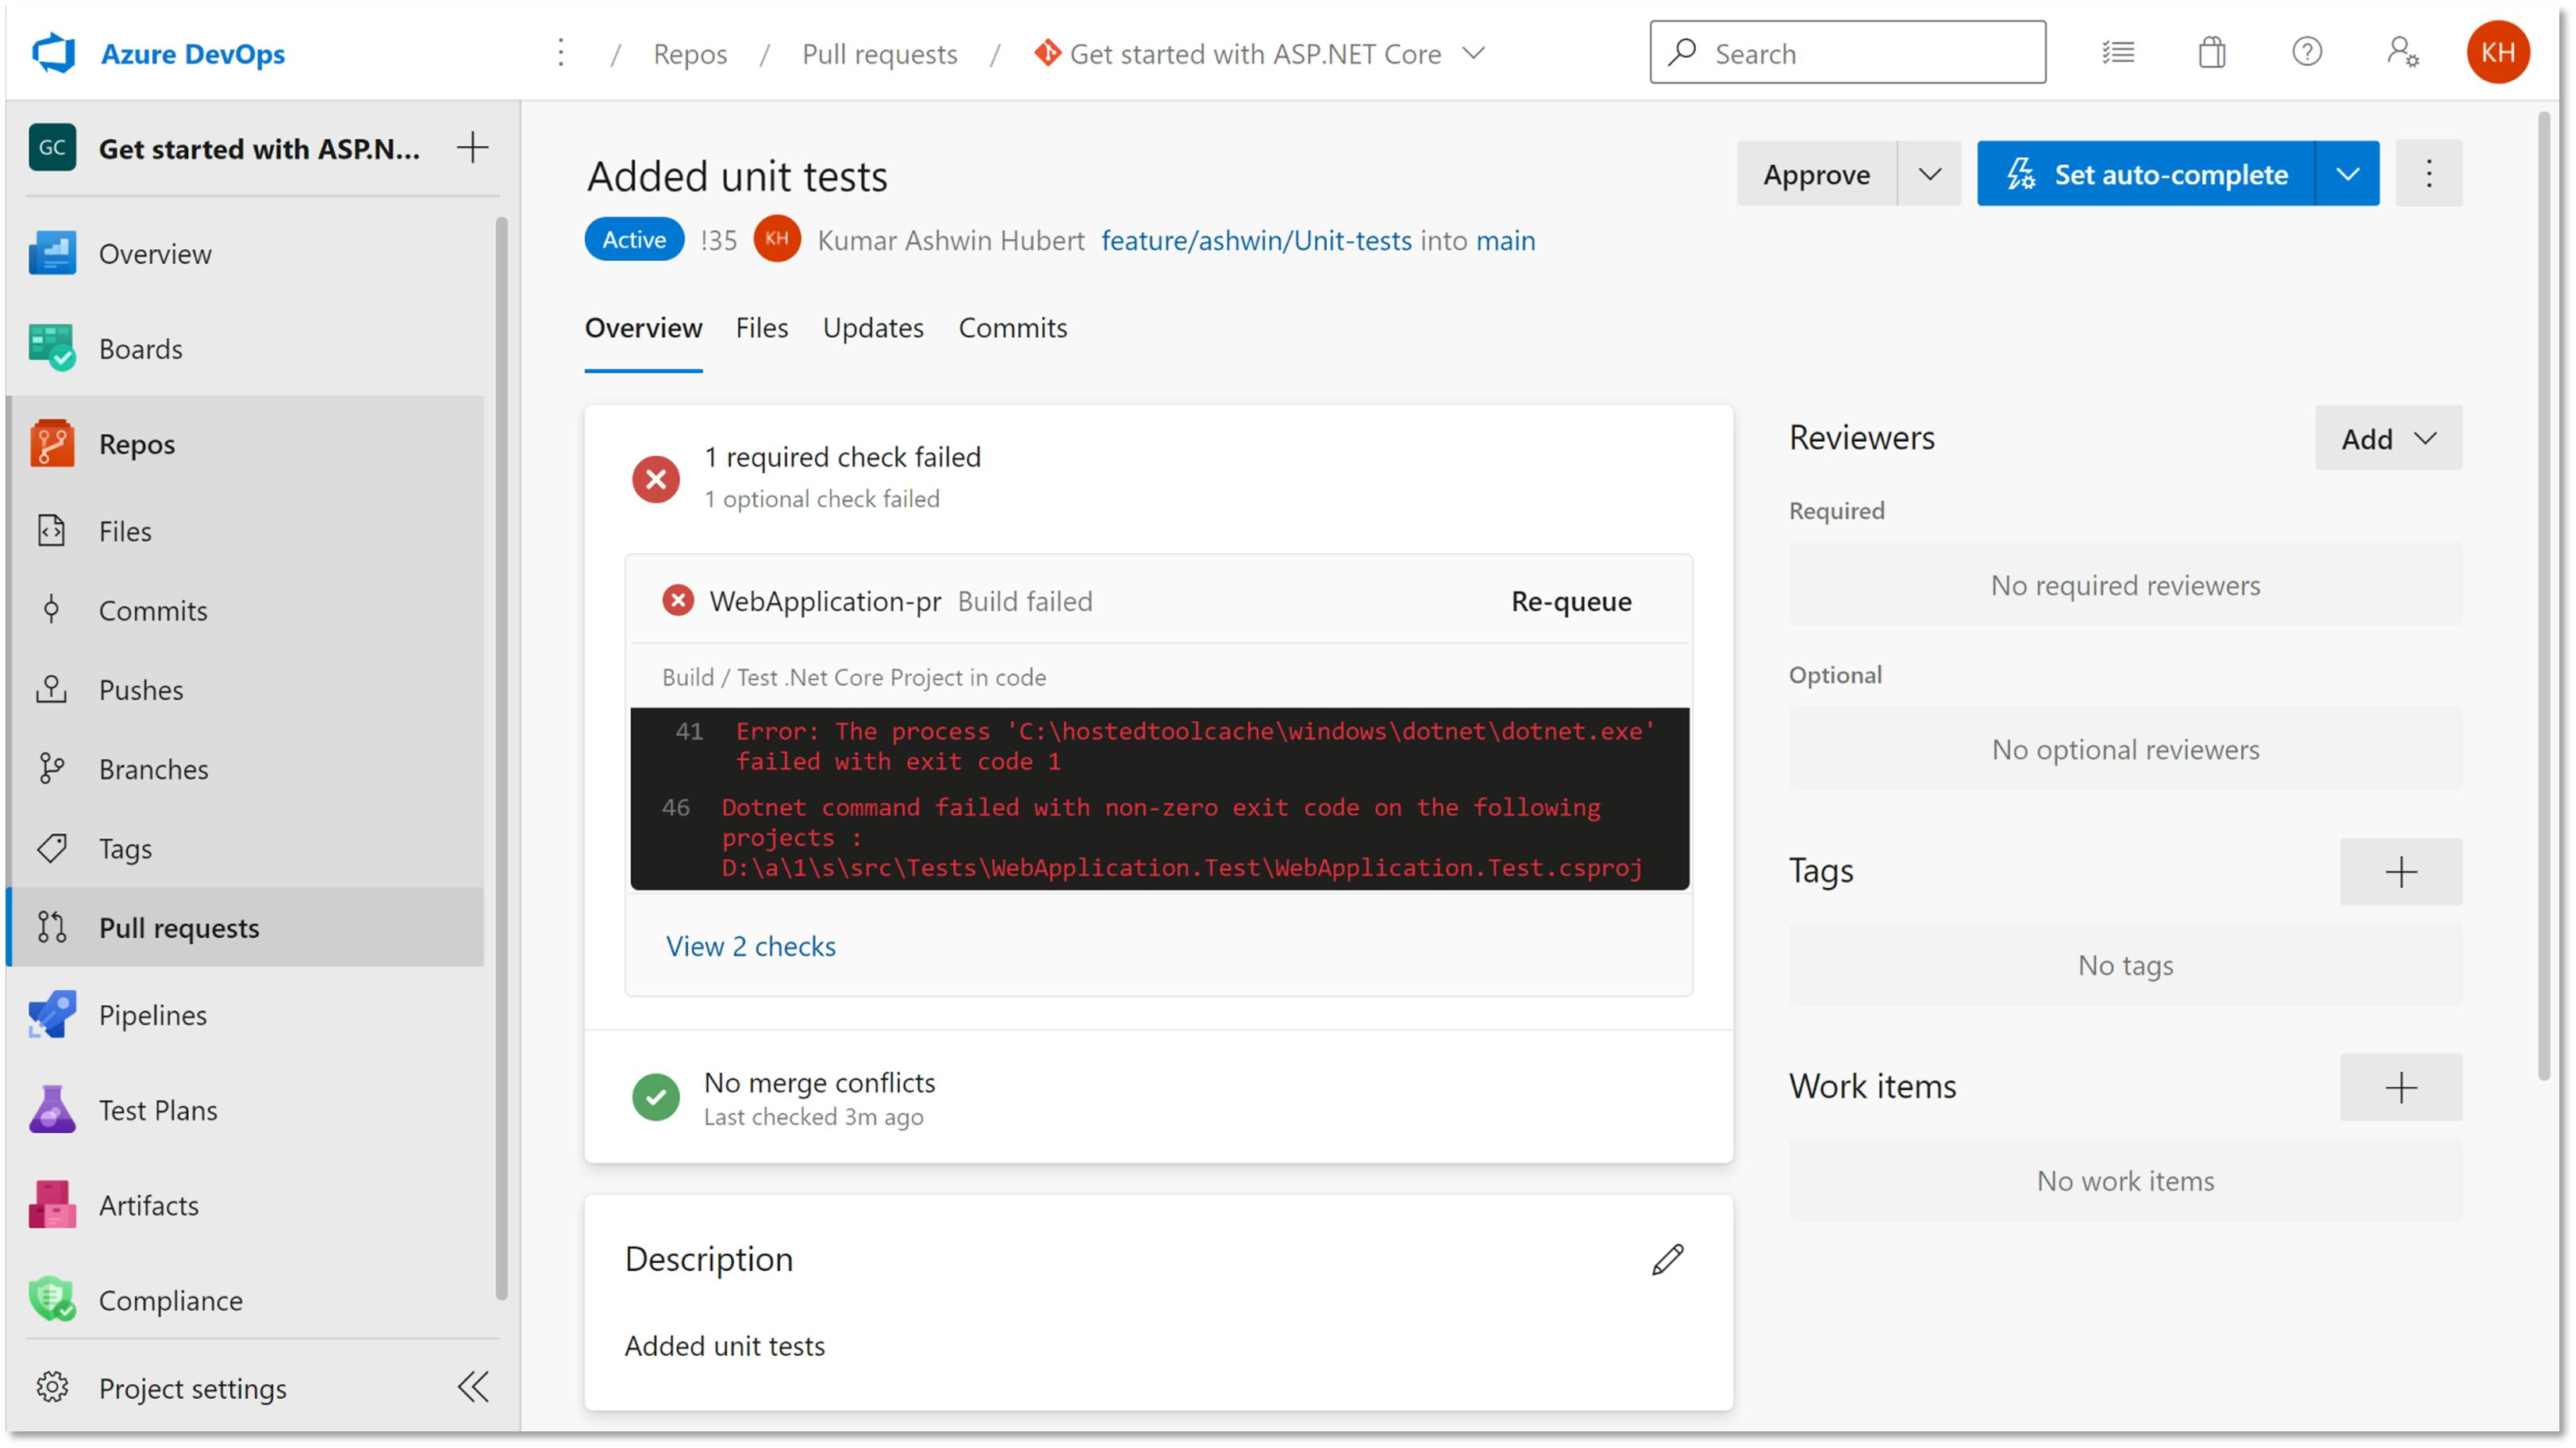
In case of build-failure, the Pull Request won't be allowed to merge.
That's it!! Azure DevOps Pull Request build validation pipeline has been set up for .Net 5 project and this policy plus pipeline will ensure only successfully building code is merged to master/main branch.

