Adding Swagger help page to Web API project

I'm a software consultant who loves to build projects and share my learnings on this blog.
Documentation is a key integral of any project. And when it comes to a Web API project, it's a must, mainly for the client side to know the APIs to call on the server and to handle the expected response objects. Manual documentation of the APIs, their request body, their responses is definitely out of the question as the APIs keep changing through the life cycle of the project. This is where Swagger comes into the picture.
The evolution of your API’s functionality is inevitable, but the headache of maintaining API docs doesn’t have to be. Swagger tools takes the hard work out of generating and maintaining your API docs, ensuring your documentation stays up-to-date as your API evolves.
Installing Swagger
To add swagger to your web API project, you need to install the Swashbuckle NuGet to the project.
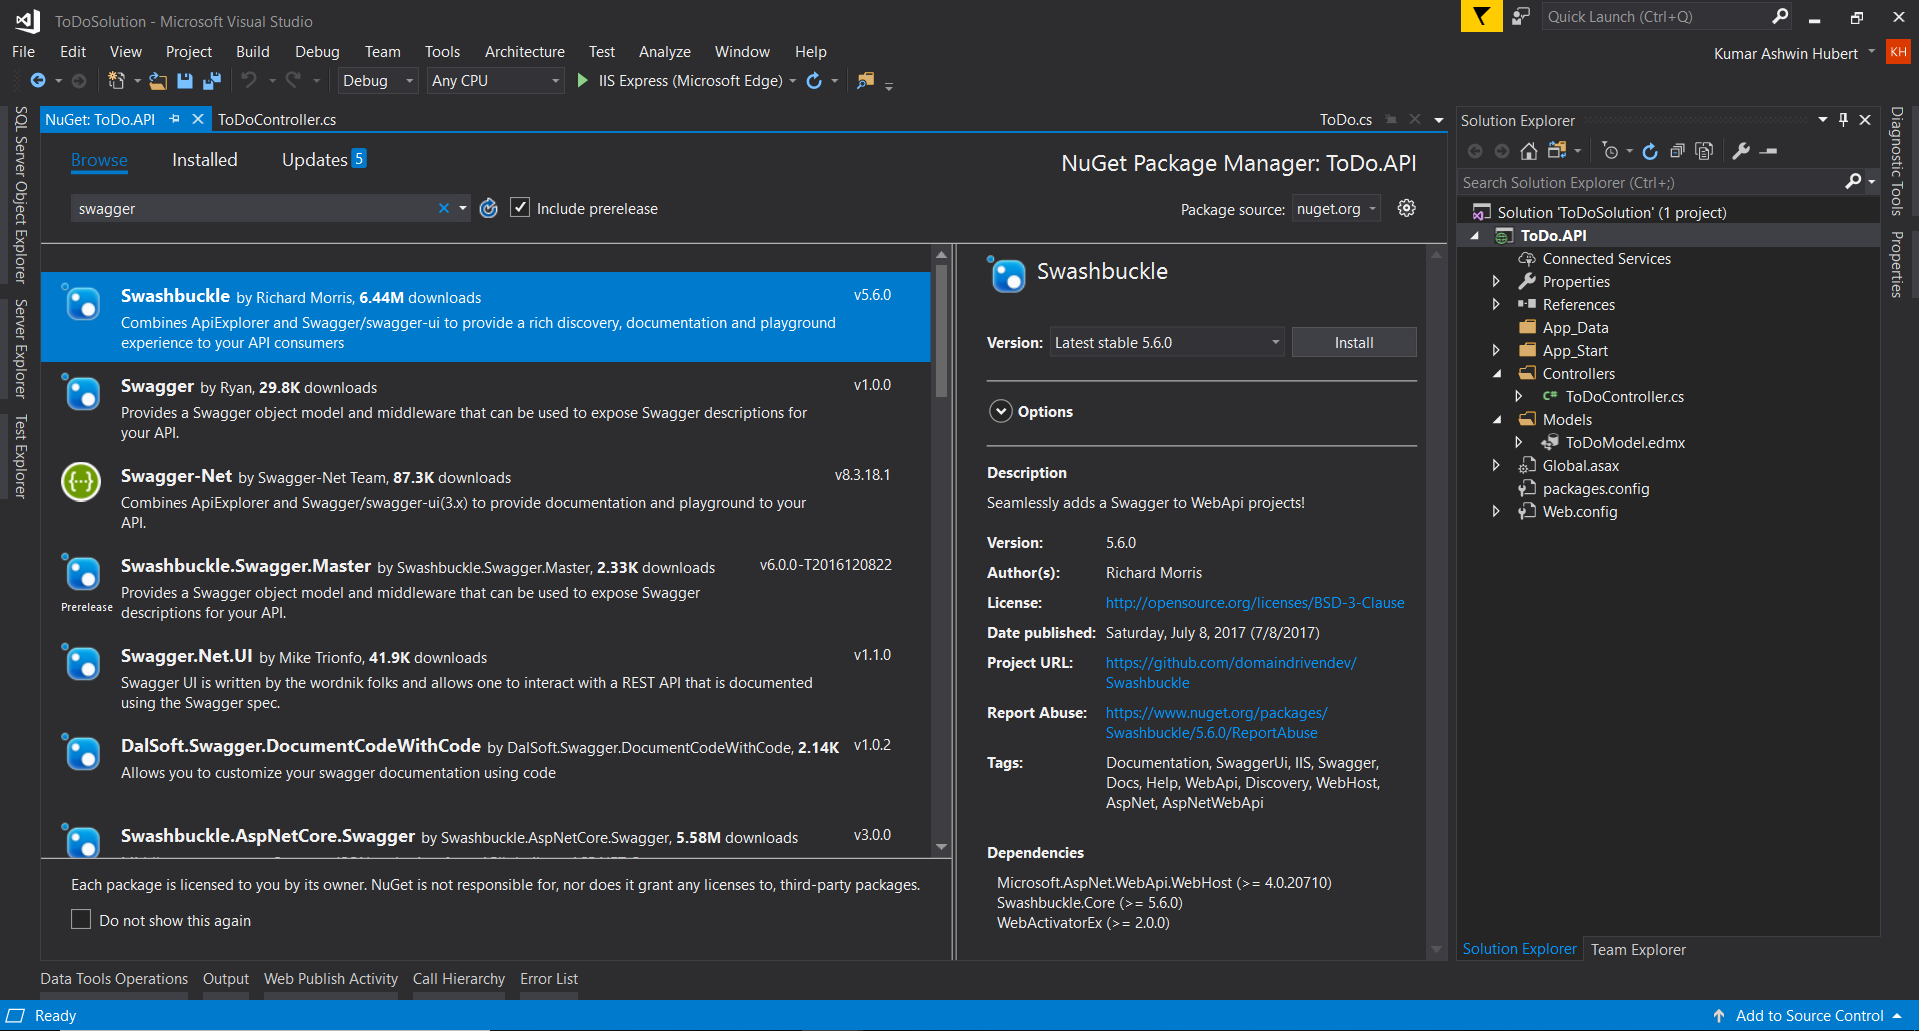
Right click on your API project and choose "Manage NuGet Packages". In the Package manager window, search for "Swagger" or "Swashbuckle" and install it.
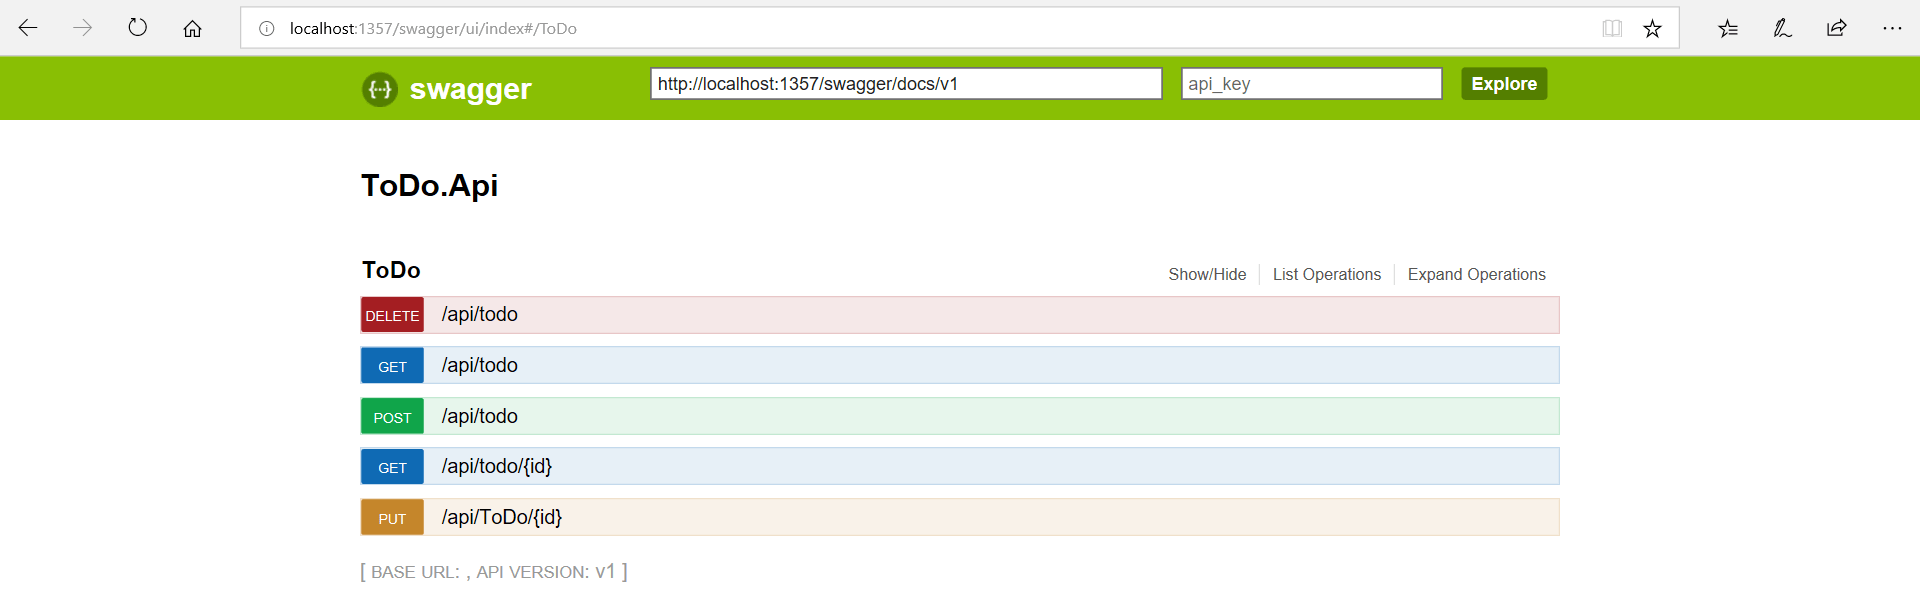
And that's it, swagger would be enabled on your project. Run the project and navigate to "http://YOUR_PROJECT_URL/swagger" for e.g. "http://localhost:1357/swagger" and you would see the swagger API documentation for your project.
What happened in the back
Well, though just installing a NuGet got the job done, it's good if you know how things are wired up and what changes are recommended to do.
If you look inside your App_Start folder, you would notice a new auto-generated file called SwaggerConfig.cs and this is where the configuration for Swagger exists.
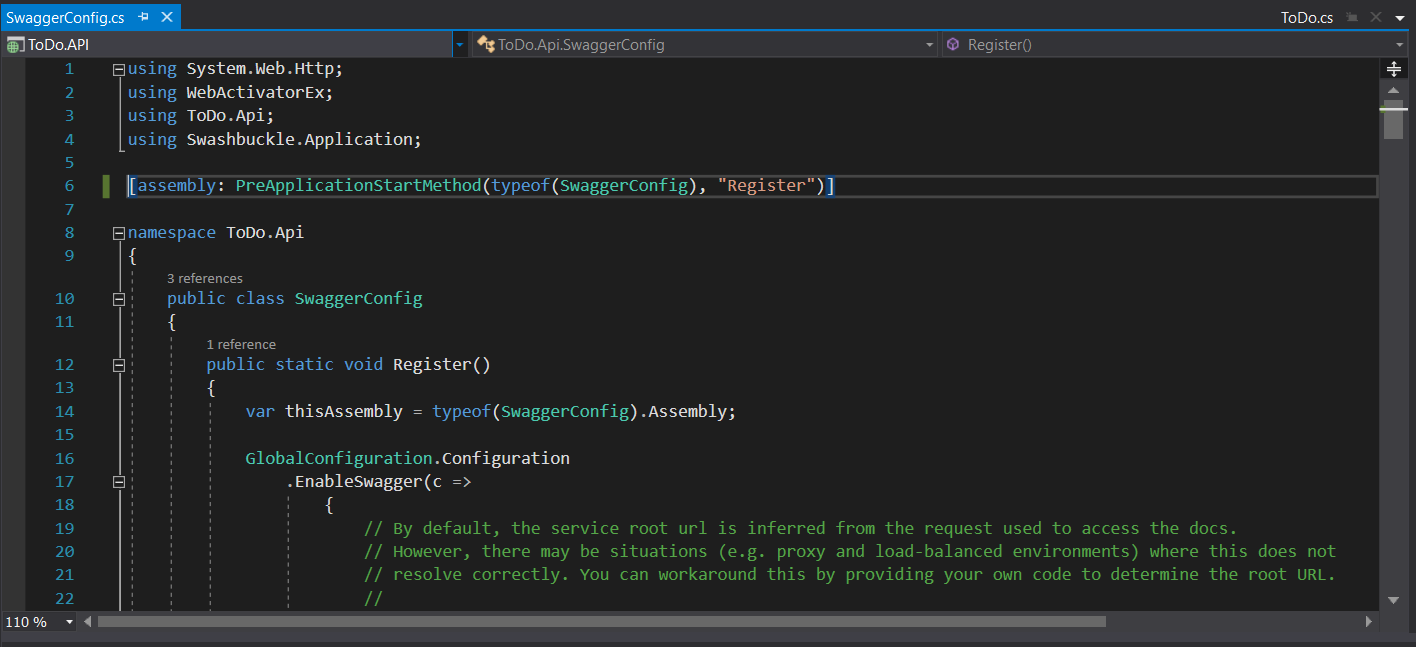
At the minimum, you will need the following configuration to enable swagger. (This is the one that's already there inside the SwaggerConfig.cs)
GlobalConfiguration.Configuration
    .EnableSwagger(c =>
    {
        c.SingleApiVersion("v1", "API Title");
    })
    .EnableSwaggerUi(c =>{});
And if you notice the line above the namespace, you would find this line of code that does the wiring up ( registering it )
[assembly: PreApplicationStartMethod(typeof(SwaggerConfig), "Register")]
We generally don't want Config registrations lying around here and there and always prefer to keep it in a single place - the Global.asax file. Go ahead and comment/delete that line from your SwaggerConfig and add SwaggerConfig.Register(); to your Global.asax file. So your Global.asax file should look something like this at the bare minimum :
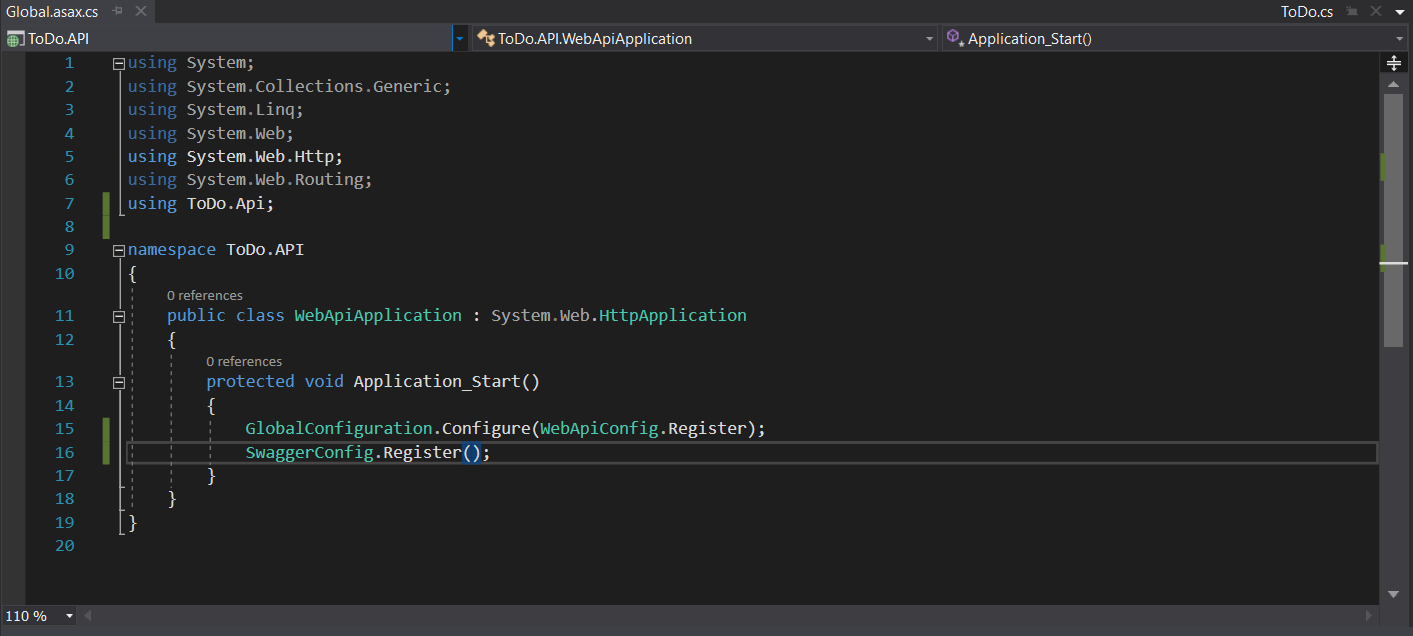
So now the registration happens from the Application_Start() method, and all our config registrations are in a single file.
Why use Swagger
The next important question, why swagger? What benefits does it provide?
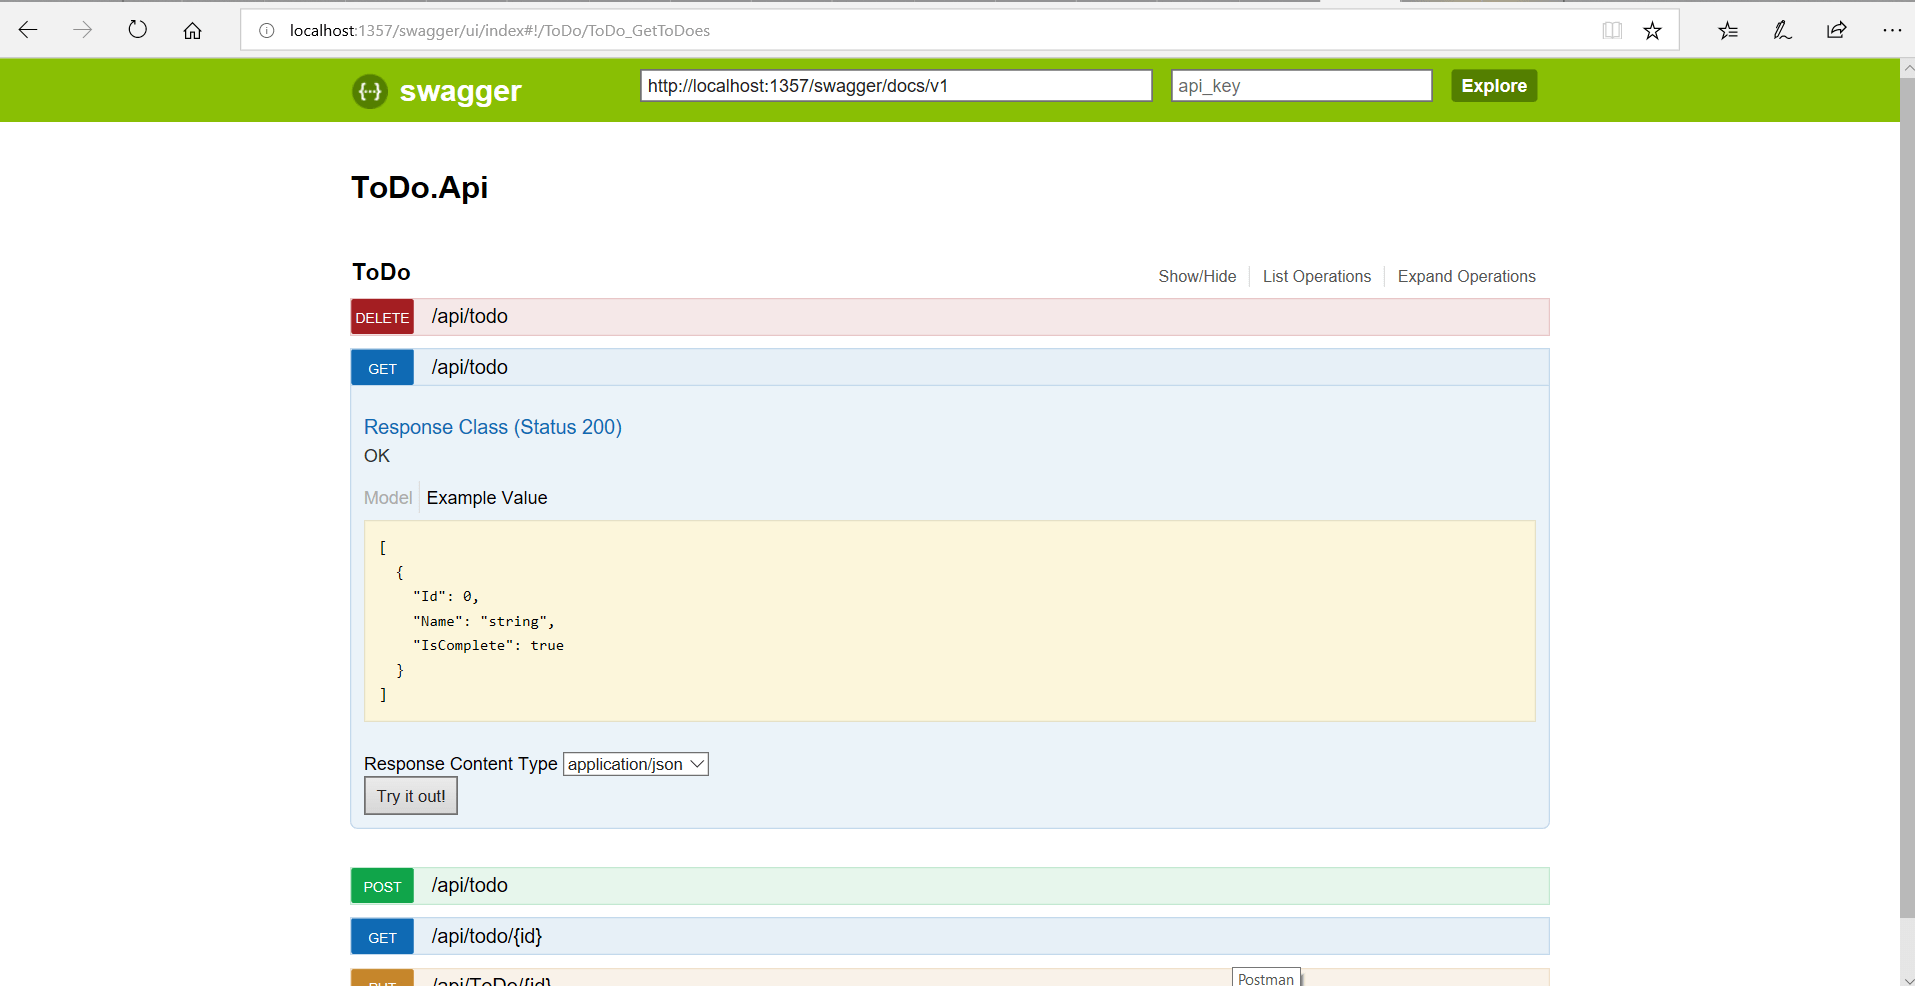
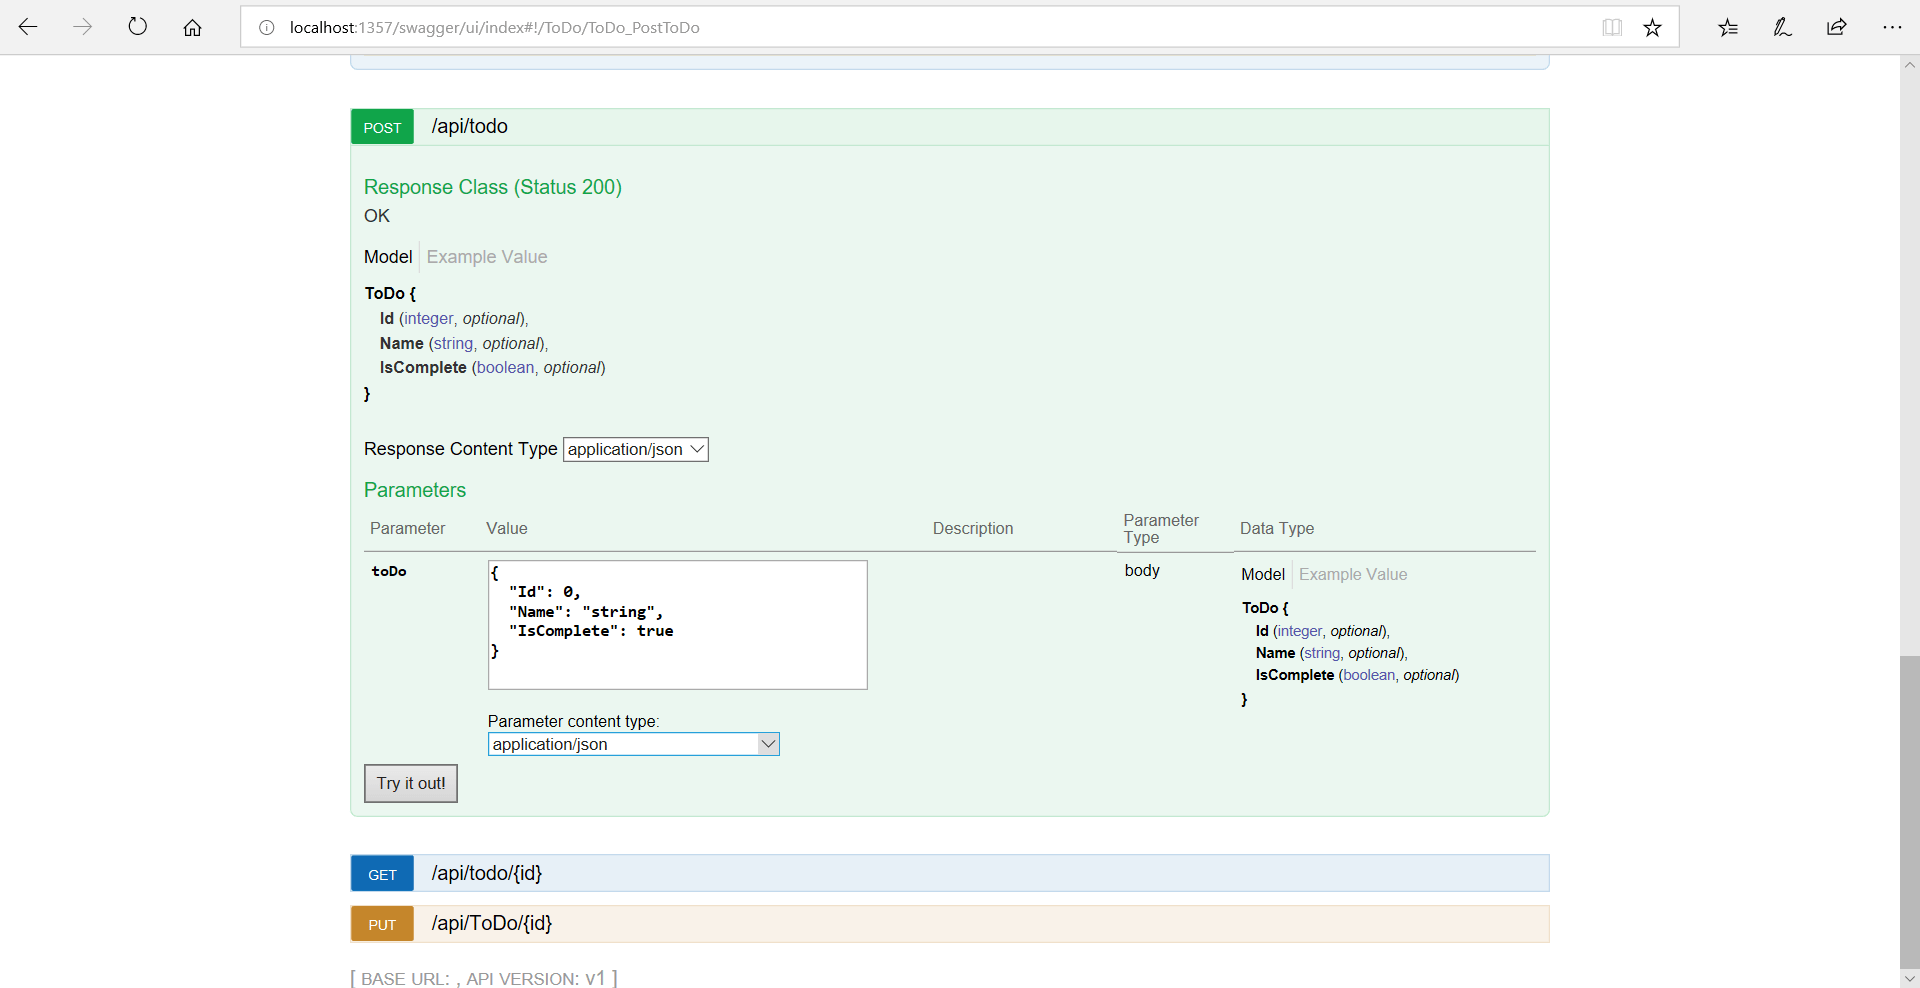
The main thing is that each public action method in your controllers can be tested from the Swagger UI. Click a method name to expand the section, add the necessary parameters, if any and click Try it out!. You can see the responses as well as the expected model.
Similar one goes for a POST request as well. You can see the expected model for the request and test it out with a sample model from the Swager UI itself.
No need for POSTMAN or other tools for testing the API. Pretty cool right!! Don't forget to try out Swagger in your next project.